Classic R #27 Build - Final Assembly - Part 6
Page 1 of 1

Classic R #27 Build - Final Assembly - Part 6
![]() by comled Tue Jul 06, 2021 1:29 pm
by comled Tue Jul 06, 2021 1:29 pm
A bit more accomplished over the long weekend.

I fitted the hood because I am going to work on the bulge that's needed to accommodate the top of the engine. Here it is with the hinges bolted on and with the two hood clasps fitted.

A closeup of the rough hole I'd hacked out. Pay no attention to the plug leads routed over the top. They'll find another route shortly. I found when I put the hood back on that I still have to cut a bit more out because I did the original markup without the PCV valve installed and it's interfering with the hood.

I made this power bulge out of fibreglass. It's the first time I've ever done anything like this and I think it turned out okay. It will need some cleanup of course but the gelcoat came out pretty well. Obviously the idea here is to use this to cover up the vast hole I cut in the hood. We'll see how that turns out. I used a steel power bulge that I'd bought years ago as the mould. Four coats of paste wax inside, followed by four coats of Partall #10 parting film, then gel coat and finally resin and glass. There was enough draft on the mould that the part just popped right out
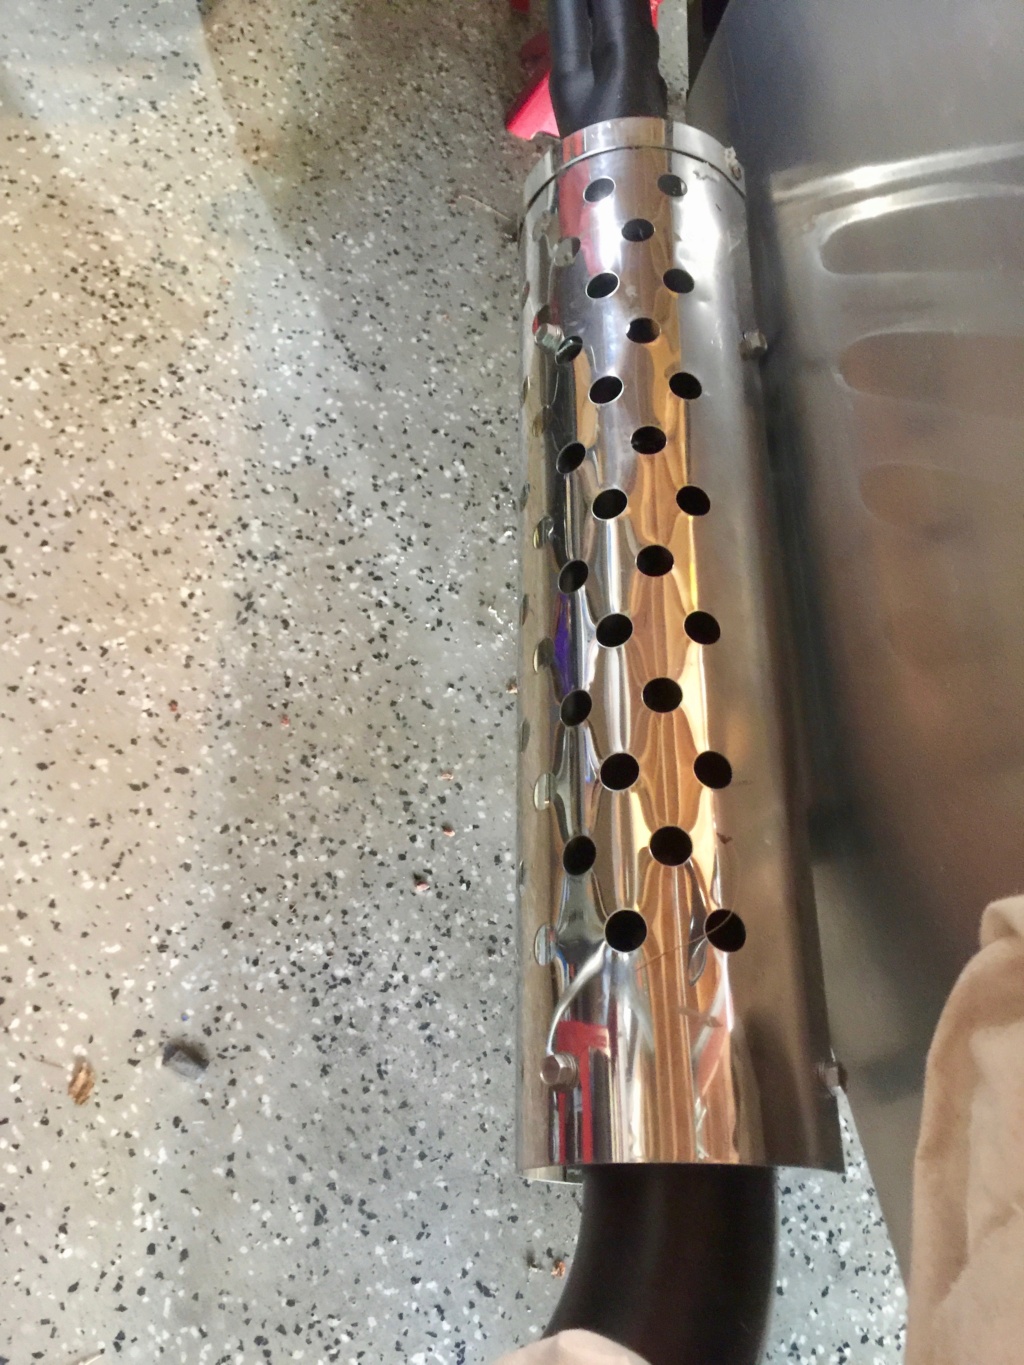
I painted the exhaust pipes a while back; finally got around to bolting the shields on. I think they look good.

And here's one of the wing mirrors bolted on temporarily. I'm not sure I like these mirrors that much and they only have E markings on them so I am moving towards replacing them with something a little better
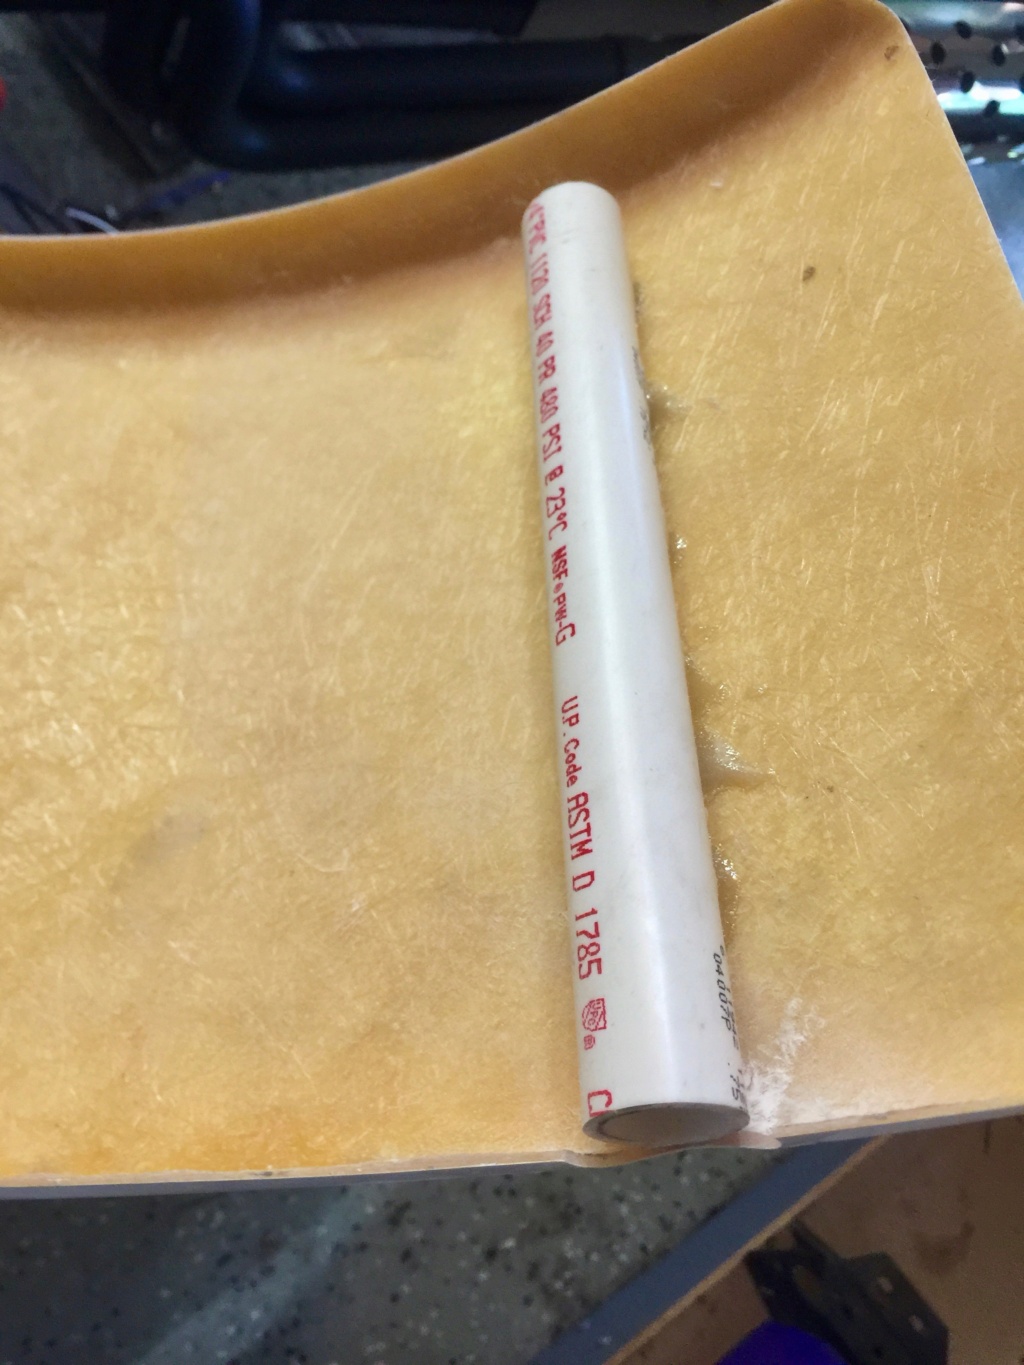
And finally the front fenders are on. Rather than bondoing the metal bracket to the fender, I cut lengths of 3/4 inch schedule 40 and used a plastic adhesive to set them in the right place. I will follow up with fiberglass reinforcement before they go to paint. I needed them in place so I can figure out how to mount marker lights on the corners

comled- Posts : 179
Join date : 2015-10-07
Location : New Hope, PA -

Re: Classic R #27 Build - Final Assembly - Part 6
![]() by comled Mon Oct 04, 2021 8:17 am
by comled Mon Oct 04, 2021 8:17 am
Since the last update I've roughed in the changes to the hood.

This is an old picture but the only one I have to hand at the moment. The glassing in is really complete other than a bit of icing to finish up.

I've also swapped out the tail lights for units that are clearly DOT type marked. I don't expect the E-marked Britax units to pass muster for the enhanced inspection here in PA so I've replaced them for now with these Grote units which have the correct S,T and I type markings. Both sides completed. It's a shame but it's just a practicality, can't be avoided.


A couple of pictures from earlier in the summer of the car outside the garage.
Right now I'm working on installing dzus fasteners on the rear end fiberglass and I got the first one done on Friday night when I could find a few minutes to work on the car. Pictures when that's complete. And I've ordered the CHMSL, hopefully properly DOT marked, which I'll most likely install hanging down from the rollover bar. I've also ordered front and rear reflectors and in a box somewhere I have the red and amber marker lights that I guess will need to go on the fenders. Finally out of pure laziness I ordered a battery master switch because I'm tired of unhooking the battery every time I get done working on the car.
comled- Posts : 179
Join date : 2015-10-07
Location : New Hope, PA -
Re: Classic R #27 Build - Final Assembly - Part 6
![]() by comled Sun Oct 10, 2021 8:27 pm
by comled Sun Oct 10, 2021 8:27 pm

Today I dealt with the radiator grille and 7 logo. I used epoxy putty to make 4 bosses on the inside rim of the nose, with a threaded insert pressed into each one. So 4 screws hold the stainless steel mesh of the grille in place. Then I attached the typical laser-cut aluminum 7 logo from the front, held in place with 3 screws and washers.

Also here is an experimental fit of a trim bead fitted between the rear wheel arch and the rear fiberglass. There is an unsightly gap that needs to be filled. This helps but I wonder whether a larger sized bead might look better?

Finally, here's a view of the engine bay I photographed while I had the hood off for the grille work. As a friend said to me recently when we were looking over the car, 'It's really shoehorned in there, isn't'. I couldn't really disagree.
comled- Posts : 179
Join date : 2015-10-07
Location : New Hope, PA -
Re: Classic R #27 Build - Final Assembly - Part 6
![]() by comled Sun Oct 17, 2021 5:20 pm
by comled Sun Oct 17, 2021 5:20 pm

This weekend's efforts involved making a panel for the aero-style fuel filler cap.

It's a two-layer assembly. A piece of 24 gauge aluminum sheet shaped to fit, and sandwiched between the rear fiberglass and the frame. The fuel filler cap mounts on this plate and is also held in place by the filler hose attached to the tank. Then a piece of 5/32" aluminum plate sits on top of that, shaped to fit flush with the rear frame cross member and the rim of the rear fiberglass which it also sits flush with. A hole in the 5/32" plate provides a recess for the aero cap to sit in so it's more or less flush with the top of the panel. I'll join the two parts of the sandwich together with rivets or screws or something and polish the top for a finished look. And the vinyl tonneau to close out the rear deck/fuel tank area will have a big opening that allows access to the filler, but will wrap completely around the rear for an unbroken line around the rim of the rear fiberglass. Materials on order, and more on that in due course.

comled- Posts : 179
Join date : 2015-10-07
Location : New Hope, PA -
» Classic R #27 Build - Final Assembly - Part 4
» Classic R #27 Build - Final Assembly - Part 5
» Classic R #27 Build - Final Assembly - Part 2
» Classic R #27 Build - Final Assembly - Part 3
» Classic R #27 Build - Final Assembly
» Classic R #27 Build - Final Assembly - Part 5
» Classic R #27 Build - Final Assembly - Part 2
» Classic R #27 Build - Final Assembly - Part 3
» Classic R #27 Build - Final Assembly
Page 1 of 1
Permissions in this forum:
You cannot reply to topics in this forum