Classic R #27 Build - Final Assembly - Part 5
2 posters
Page 1 of 1

Classic R #27 Build - Final Assembly - Part 5
![]() by comled Mon Oct 26, 2020 8:29 am
by comled Mon Oct 26, 2020 8:29 am
Another busy week but I spent a few hours on the Classic R. Last weekend was a push to make some progress on the rear end. I got the ride height setup by fiddling with the spring preload and then fine tuning with the pushrods, then after a bit of head scratching trimmed the leading edge of the rear end fiberglass where it lines up with the aluminum side panels. Pictures to follow. Then I cut some 2.5" shims out of a 2x4 and with the car on the ground used them to set the wheel arch spacing around the rear wheels, pretty much straight out of Scott's write up for the Classic R chassis. I used three 1/4-28 bolts radially around the flange of the wheel arch to attach it initially to the fiberglass rear end, with more bolts to follow. I'd gotten hung up on whether they should mount somehow to the chassis but eventually my slow moving brain realized that they shouldn't because it's much more convenient to be able remove the entire rear end, rear lights, rear harness and mudguards as a single subassembly. Remove two connectors, undo some Dzus fasteners and lift the whole thing off. Once that dawned on me things went a little smoother.
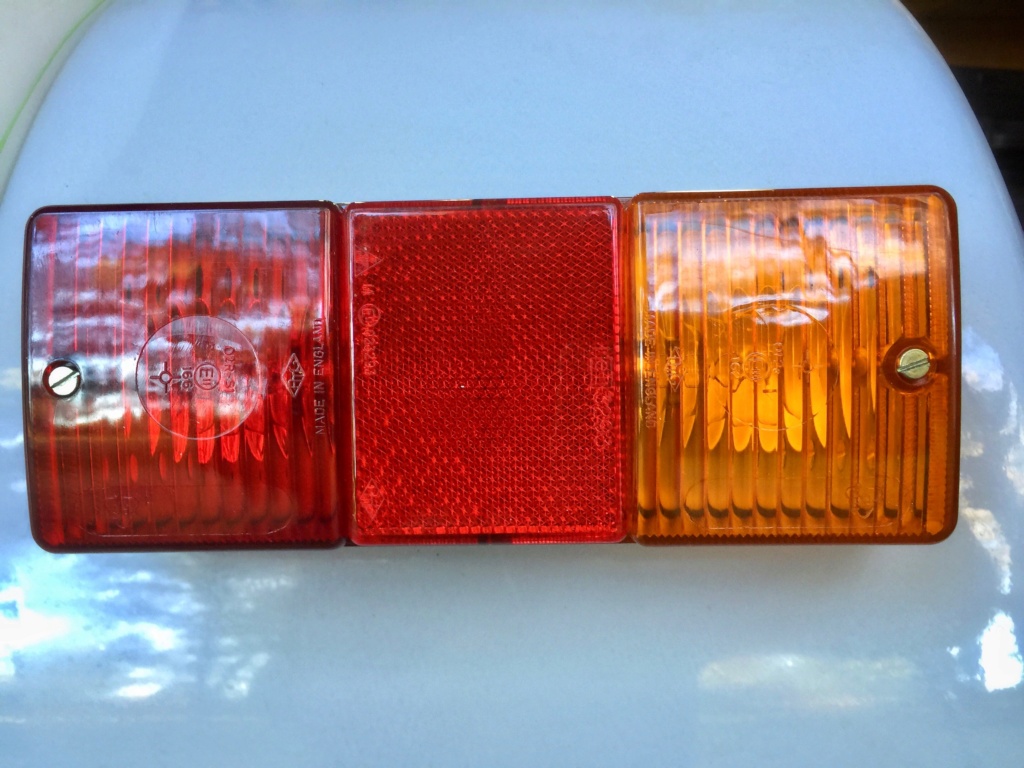
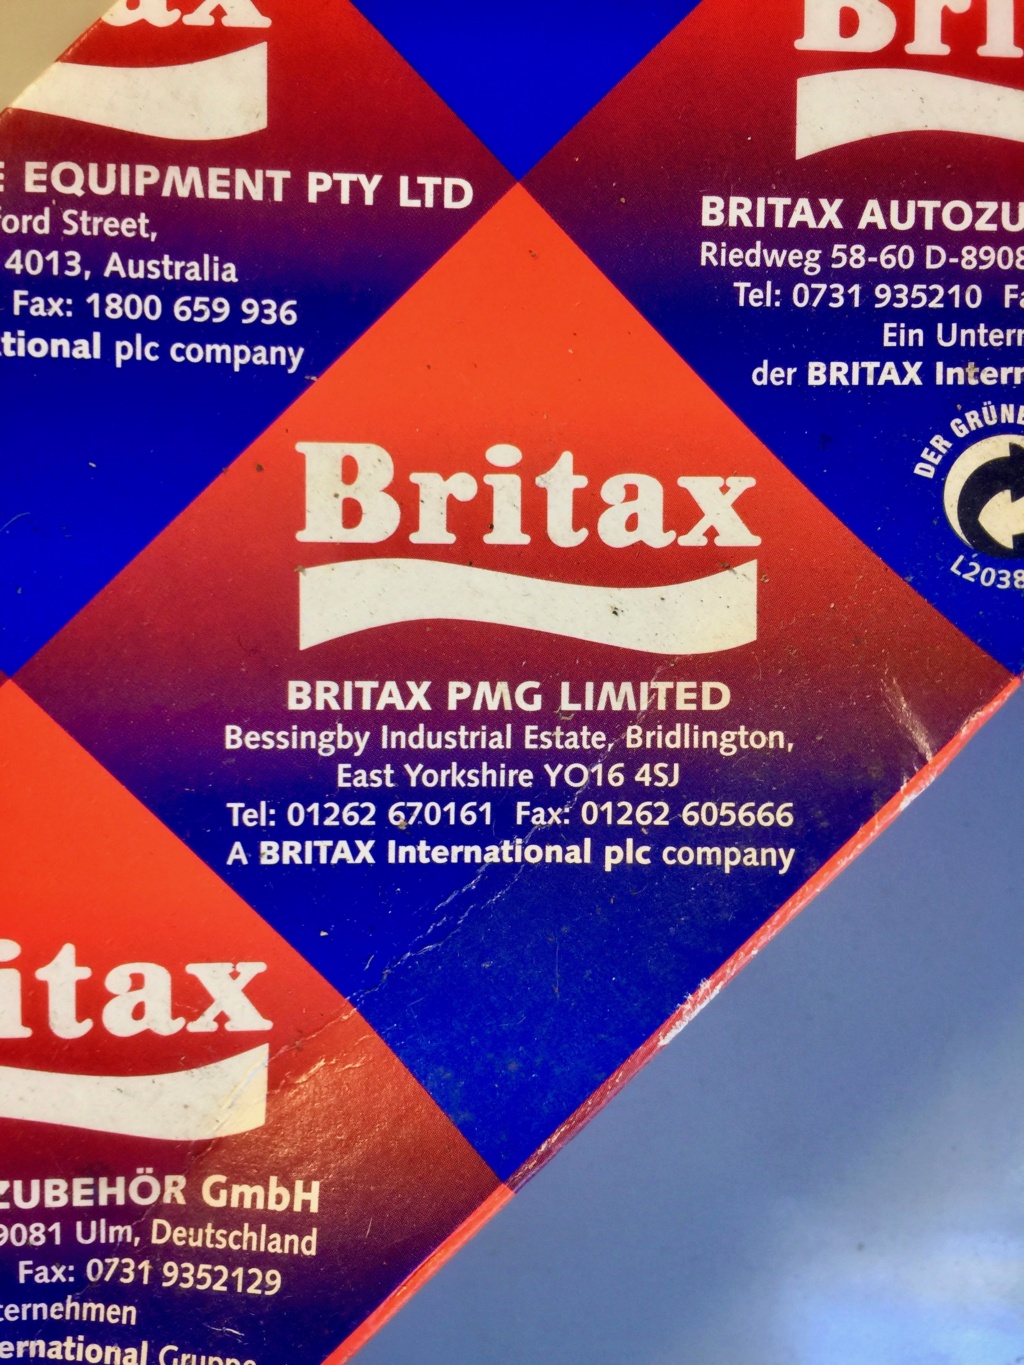
Here's the rear light cluster, a Britax part. The same one was used by Caterham I think. It's a decent quality assembly but only E-marked. If anyone does use this, the wire colors decode as follows:
Black - Ground
Red - Tail
Green/Purple - Stop
Light Green - Turn
As I understand it, PennDOT requires these lights to be a minimum of 15 inches above the ground.
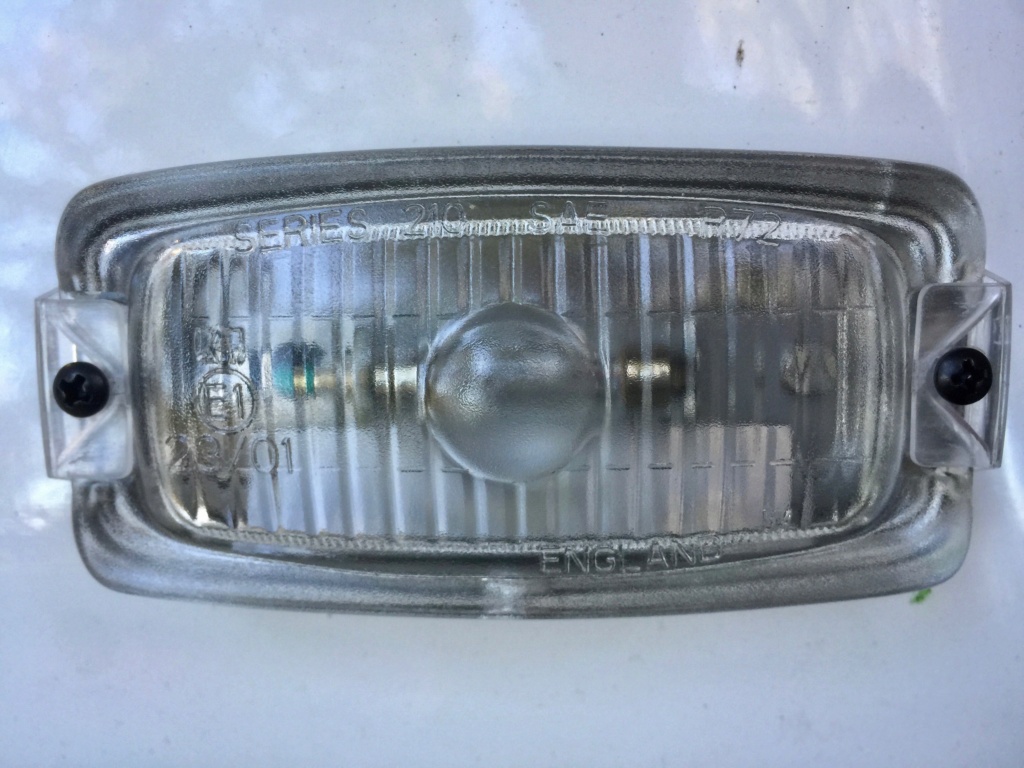
These Wipac 210 style reverse lamps are SAE marked and E-marked, and are also a decent quality part but weren't terribly bright when I tested them so I may upgrade the bulbs.
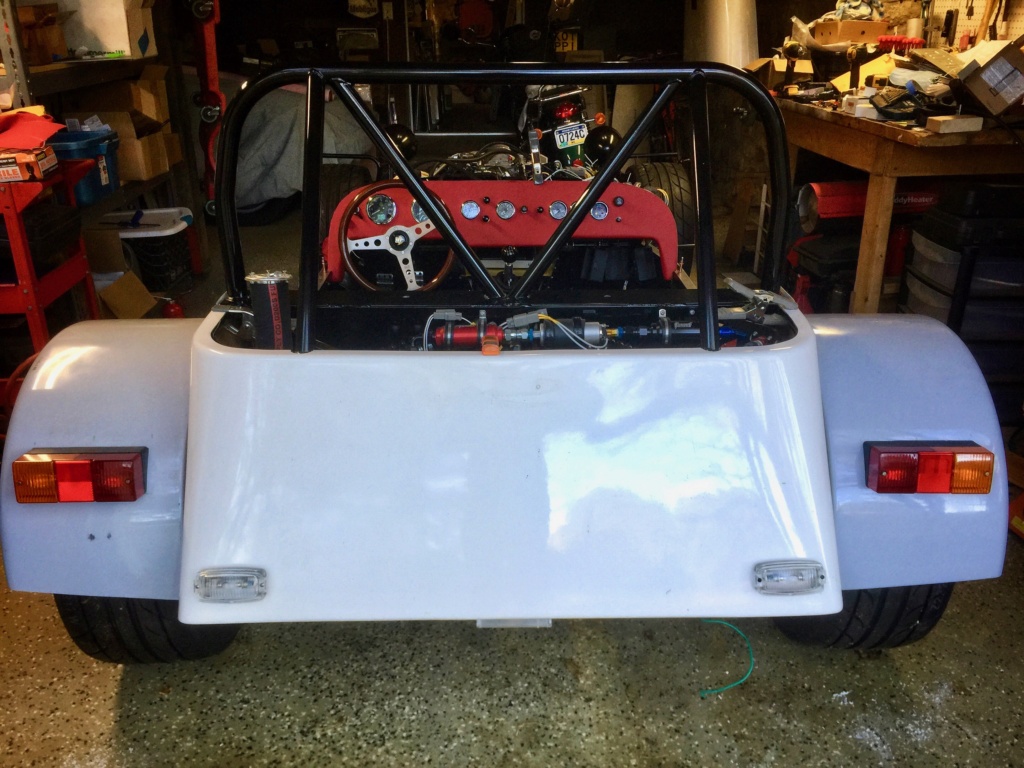
And the rear end with wheel arches and lamps clamped on temporarily.
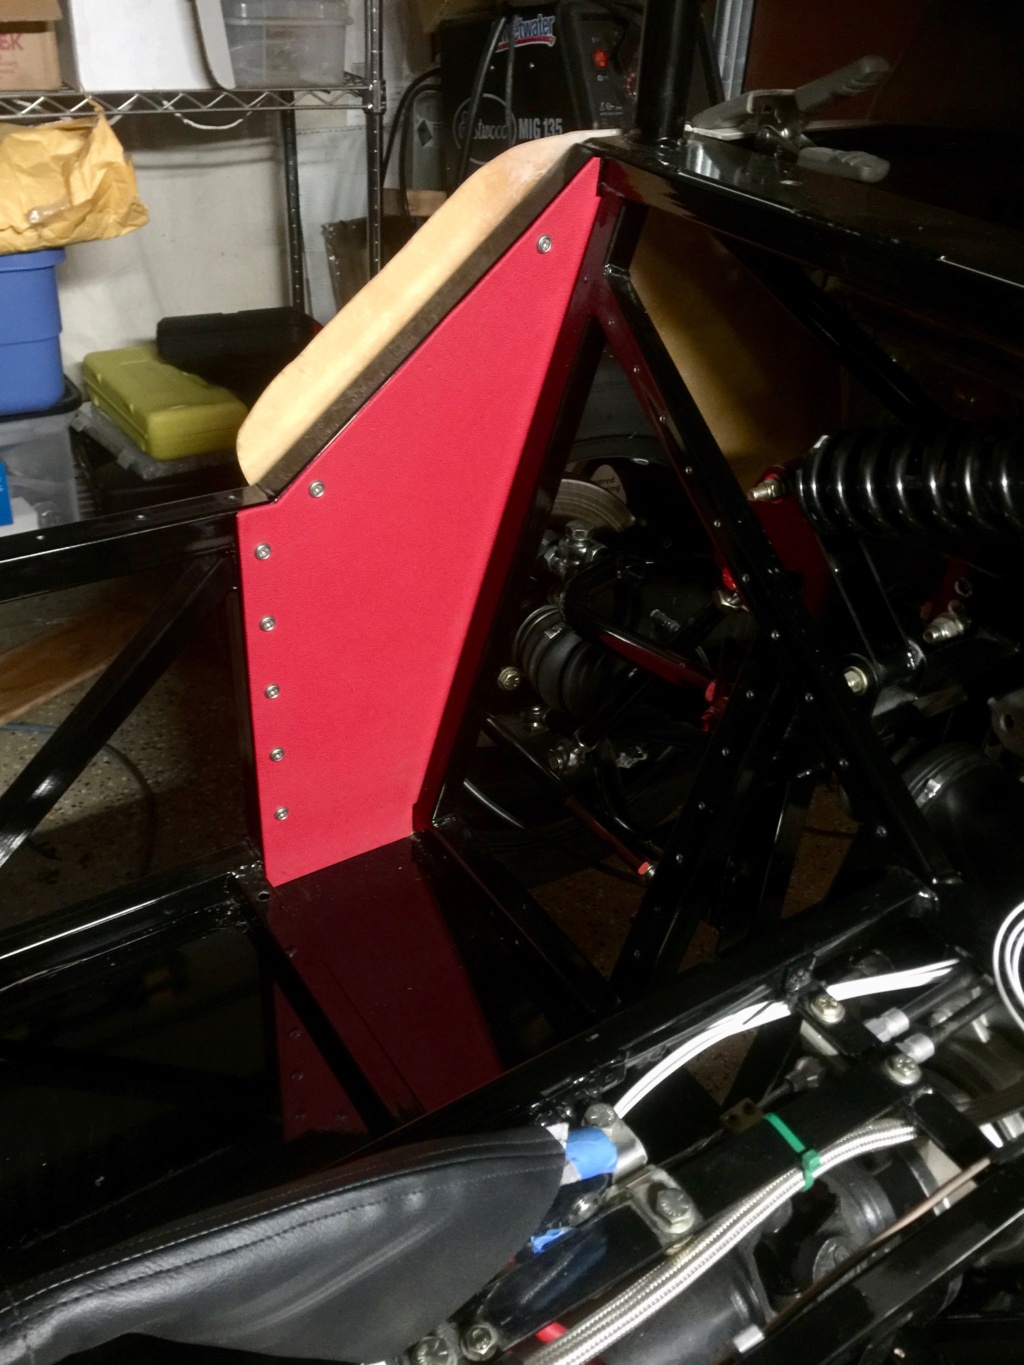
On the interior I fitted the hip panels after covering them in vinyl. You can see in this image I still haven't trimmed the top edge of the fiberglass rear end yet.

Rear panel trimmed out and drying prior to installation
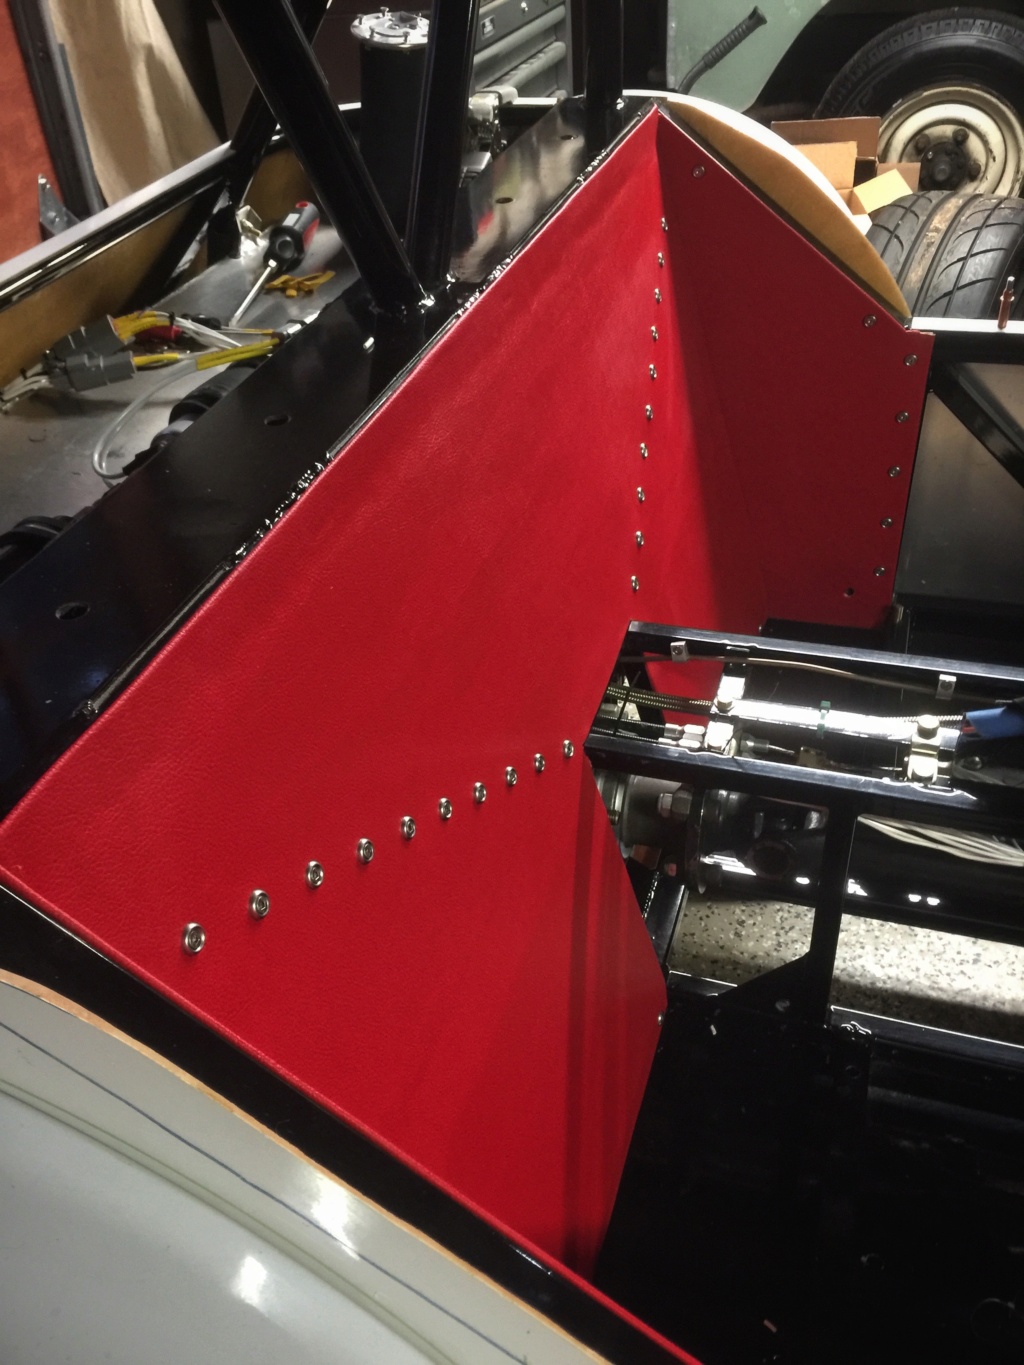
And all the rear panels installed using square drive #8 self tapping screws and flange cup washers.
Now it's on to the front end to fit the mudguards, wire the headlamps, turn signals and front marker lights. The reverse light switch and handbrake switch are both cabled through the harness but not connected to the electrical panel yet. On the shopping list for this week is front amber SAE-marked reflectors - and a third high mounted brake light which apparently I need for PennDOT compliance. Last week I picked up some black anodized Dzus fasteners, springs and brackets that I need to fit on the rear end fiberglass along with the remaining wheel arch bolts. May get that done this week too if time permits. I also found a spot where a bolt is interfering with one of the rear springs - need to look at that and figure out a fix. And a bodged connection in the engine bay on the temperature sender connector that needs making good.
Seems like a million small things to do before the next really big task which is the scuttle/windscreen/mirros/wipers/defroster vents assembly.

comled- Posts : 179
Join date : 2015-10-07
Location : New Hope, PA -

Re: Classic R #27 Build - Final Assembly - Part 5
![]() by Ted FM 13 Mon Oct 26, 2020 11:34 pm
by Ted FM 13 Mon Oct 26, 2020 11:34 pm
Wow, just unbelievable, the attention to detail. Looking forward to a complete cook's tour of the finished product and video of it driving. Good work.

Ted FM 13- Posts : 112
Join date : 2015-11-27
Location : Sacramento CA -
Re: Classic R #27 Build - Final Assembly - Part 5
![]() by comled Sat Nov 07, 2020 9:00 am
by comled Sat Nov 07, 2020 9:00 am

One headlamp is better than none I suppose. Hope to finish the other front lighting this weekend except for the PA-mandated marker lights that will have to wait until the mudguards are fitted.
comled- Posts : 179
Join date : 2015-10-07
Location : New Hope, PA -
Re: Classic R #27 Build - Final Assembly - Part 5
![]() by comled Tue Jan 19, 2021 10:24 pm
by comled Tue Jan 19, 2021 10:24 pm
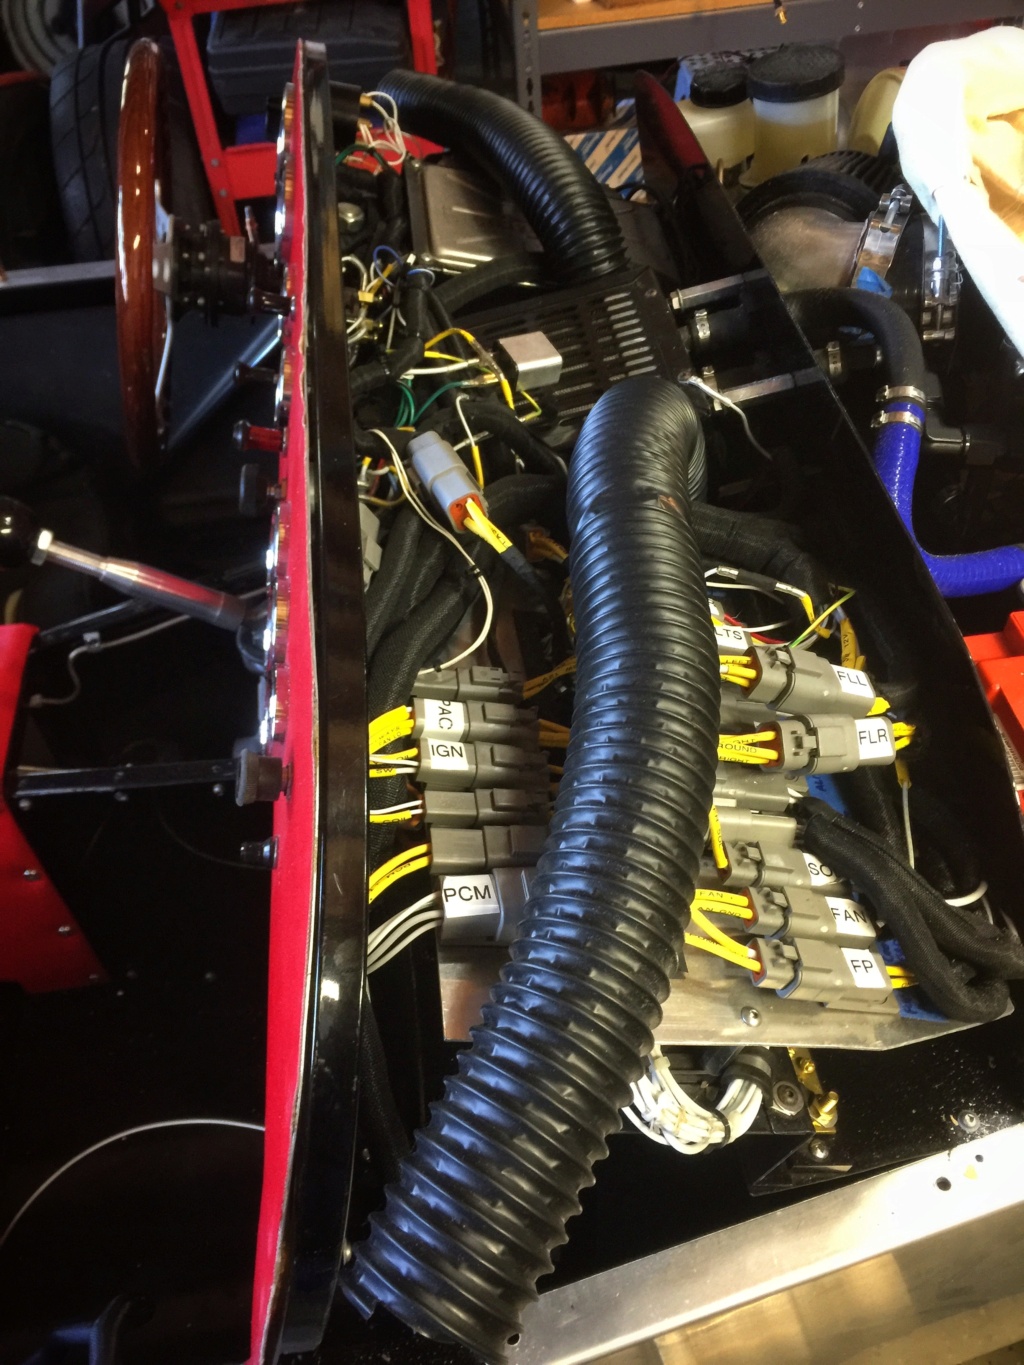
The wiring's essentially complete except for front and rear marker lights and the wiper motor, and I've turned my attention to the scuttle, windshield mounting, wipers and demister vents. Having a glass windshield on one of these seems like a bit of an afterthought but it's a must-have for road use in PA.
Looking down from the top of the windshield, vertically down the windshield brackets, the angles to align the windshield frame with the brackets are awkward. Additionally the windshield frame u-channel is quite thin and I don't fancy screwing anything into it directly. So I made brackets that absorb the awkward angles and clamp to the windscreen frame with setscrews. The frame slides into the bracket on each side. This makes it possible to adjust the position of the windshield, and it's easy to remove if necessary
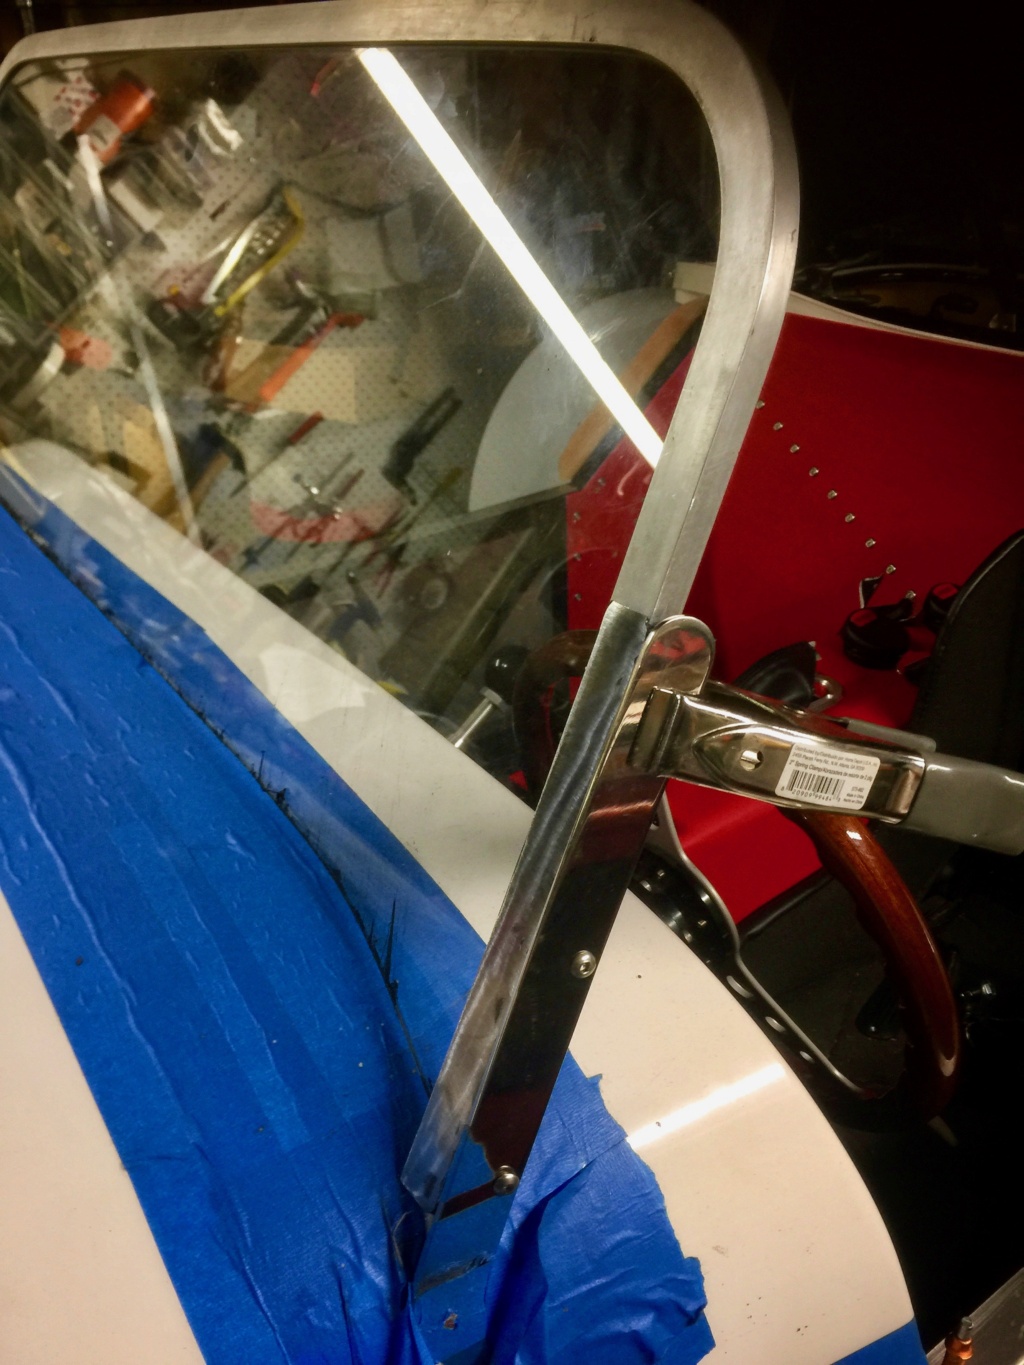
Windshield frame positioned relative to the bracket and clamped in place
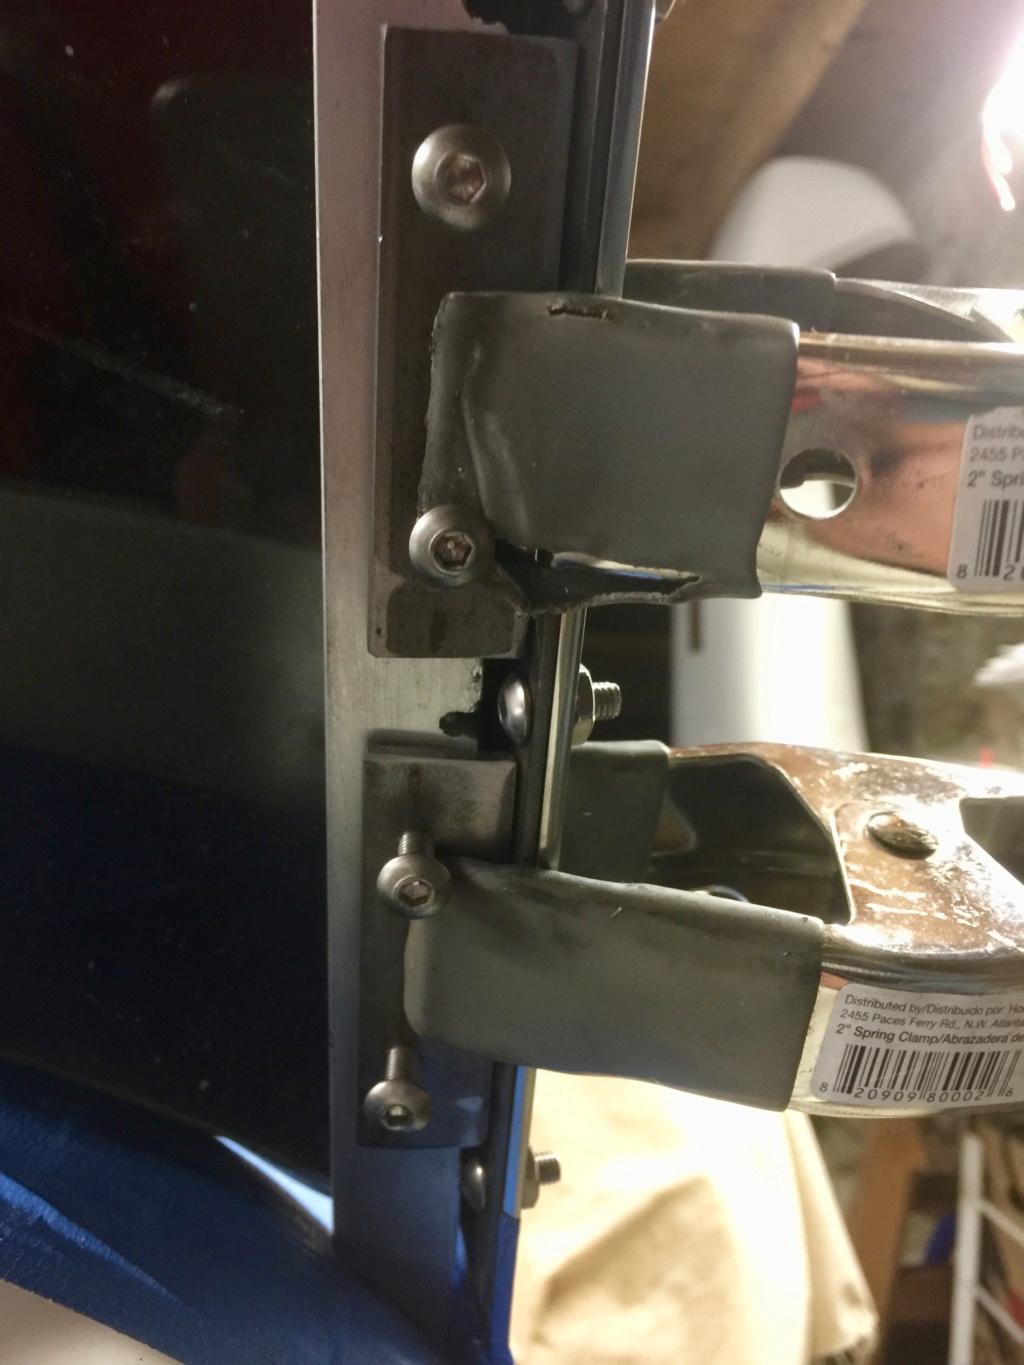
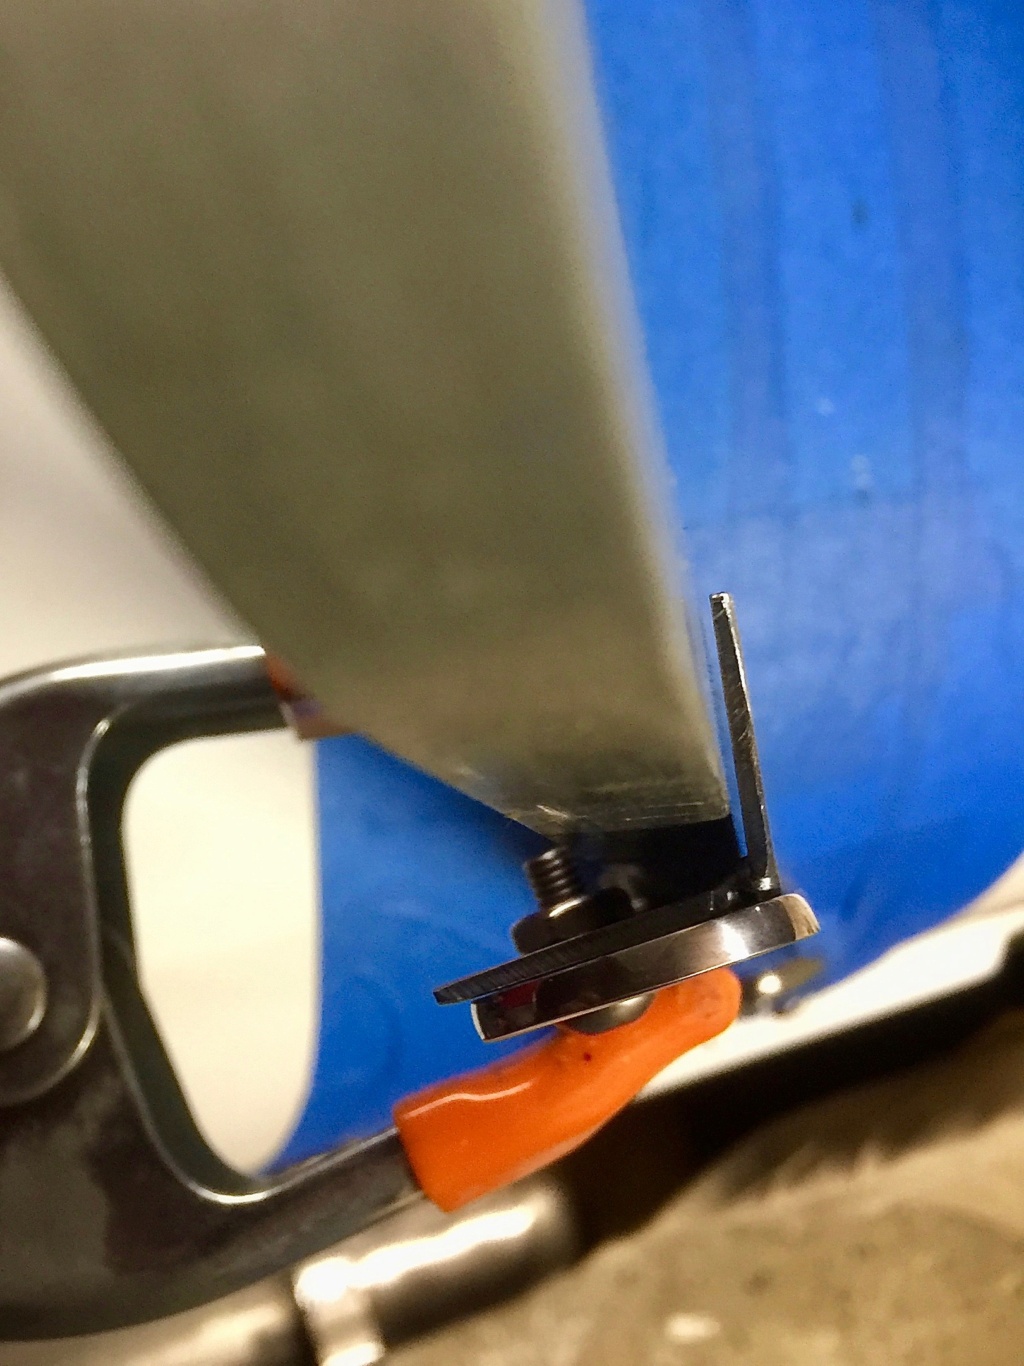
Detail of the rear of the bracket, clamped up ready to tack weld together. The setscrews work well and provide a solid means of mounting the windshield
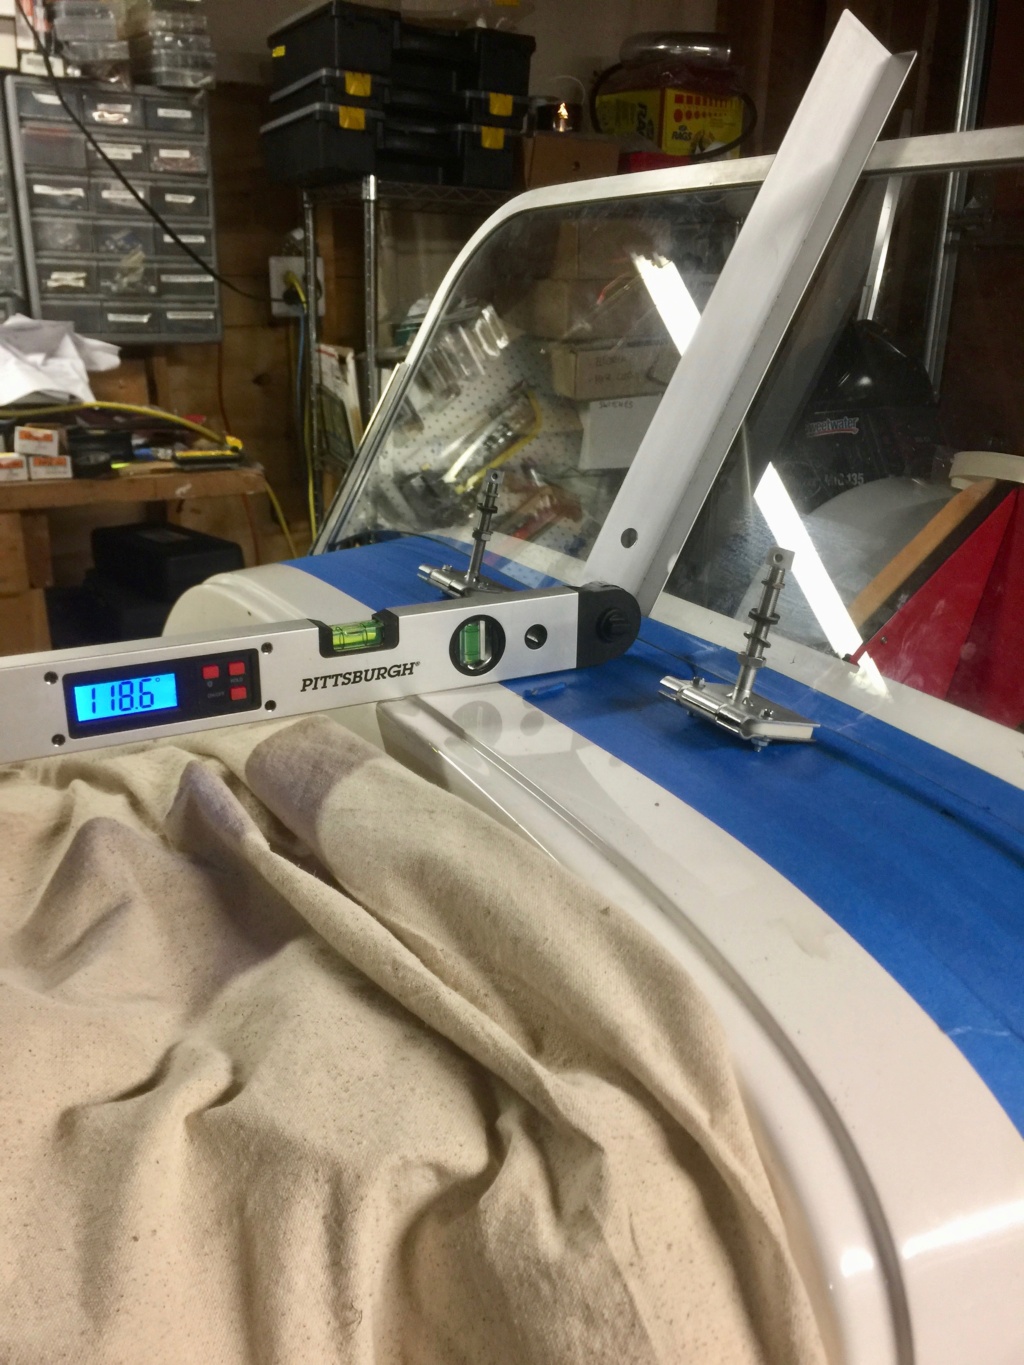
With the frame in place the angle between the windshield and the scuttle can be measured

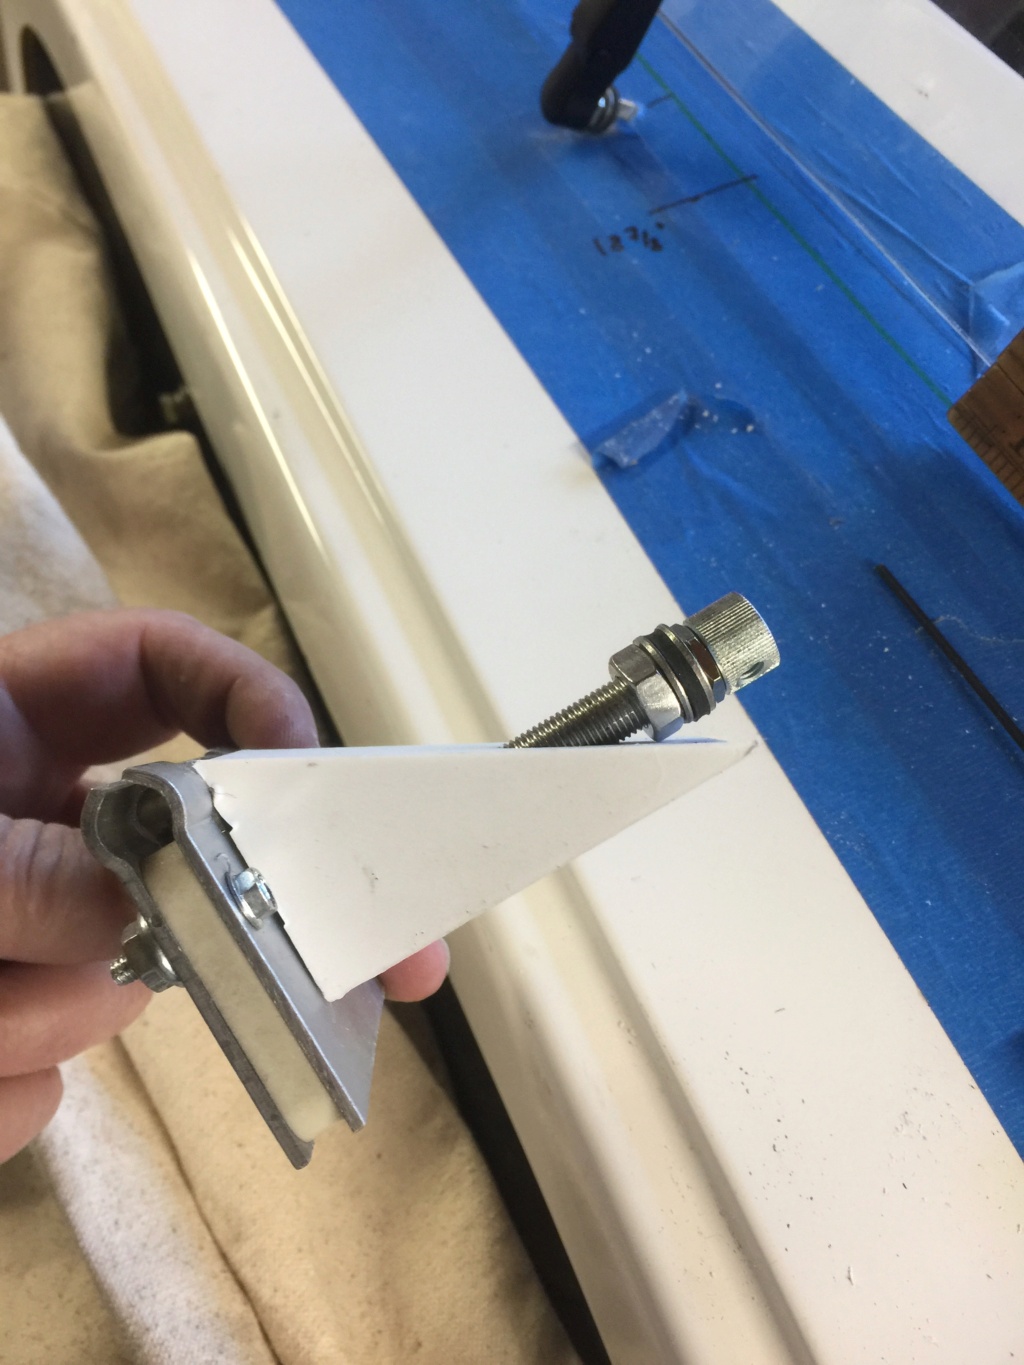
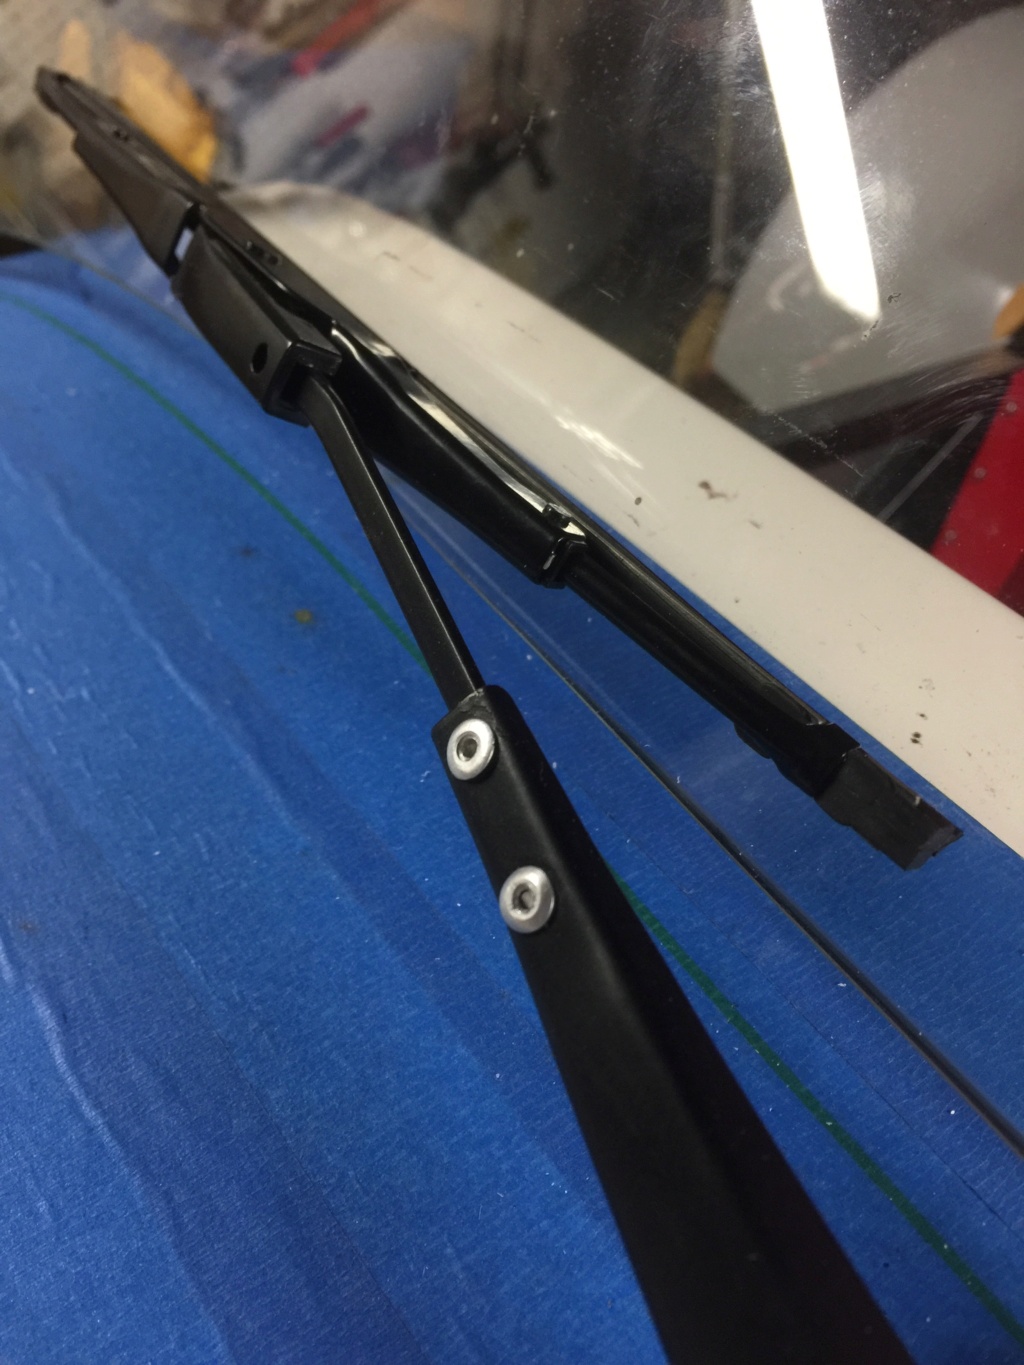
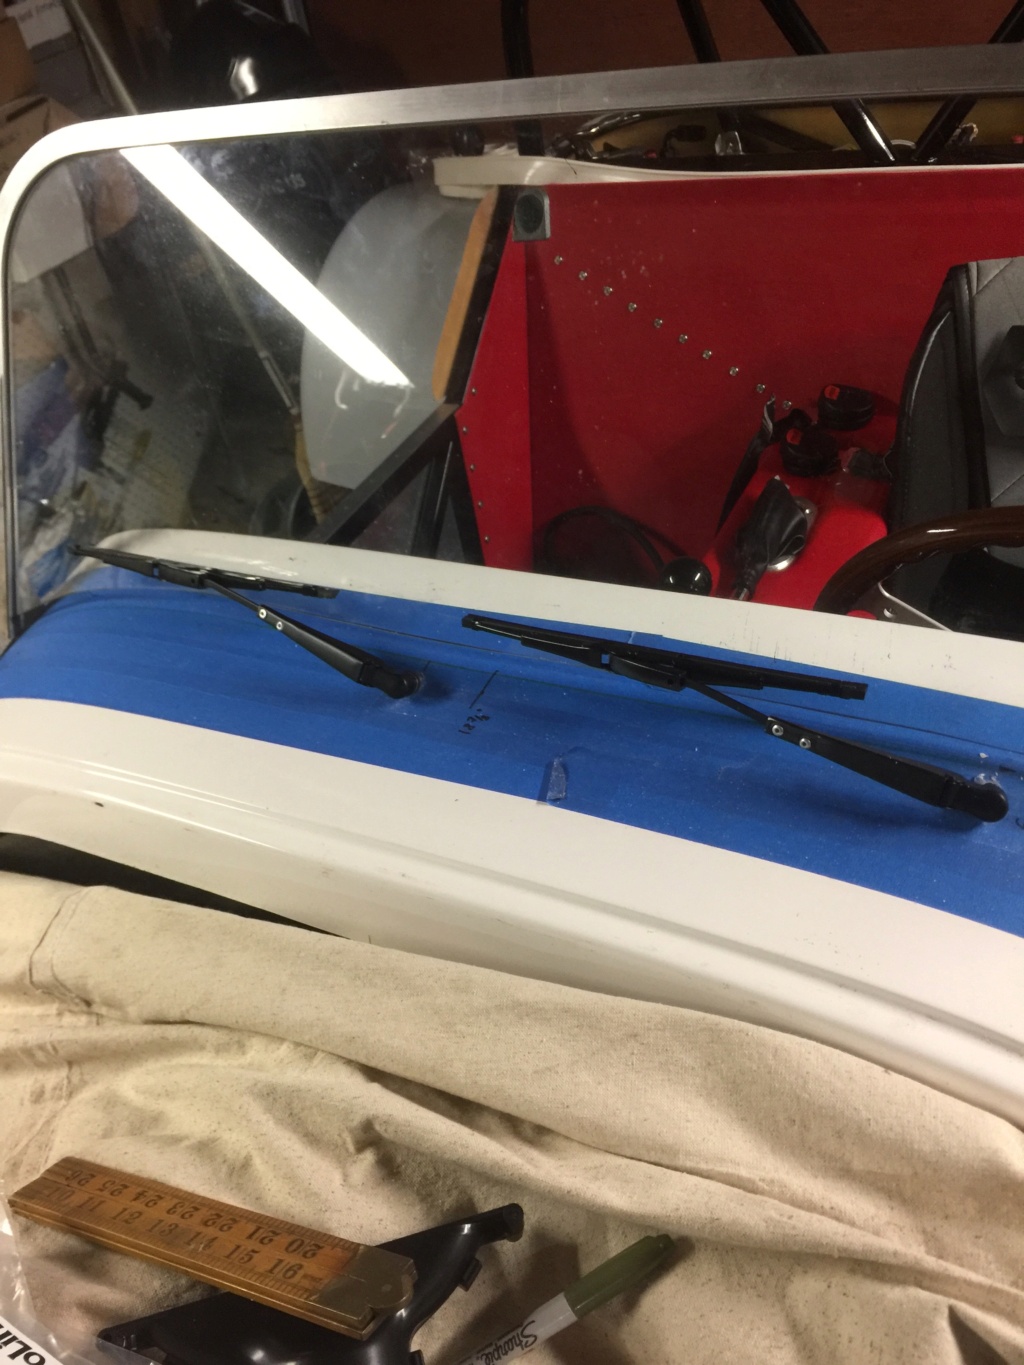
The angle for mounting the wiper gearboxes is quite shallow. I'm making up some wedge shaped spacers that will set the gearbox shaft so that it is exactly 90 degrees to the windshield

I don't know how these will work out. I'll fabricate them this week. I'll be using wiper arms and blades off a Land Rover Series 2A. The arm lengths will need to be adjusted to fit
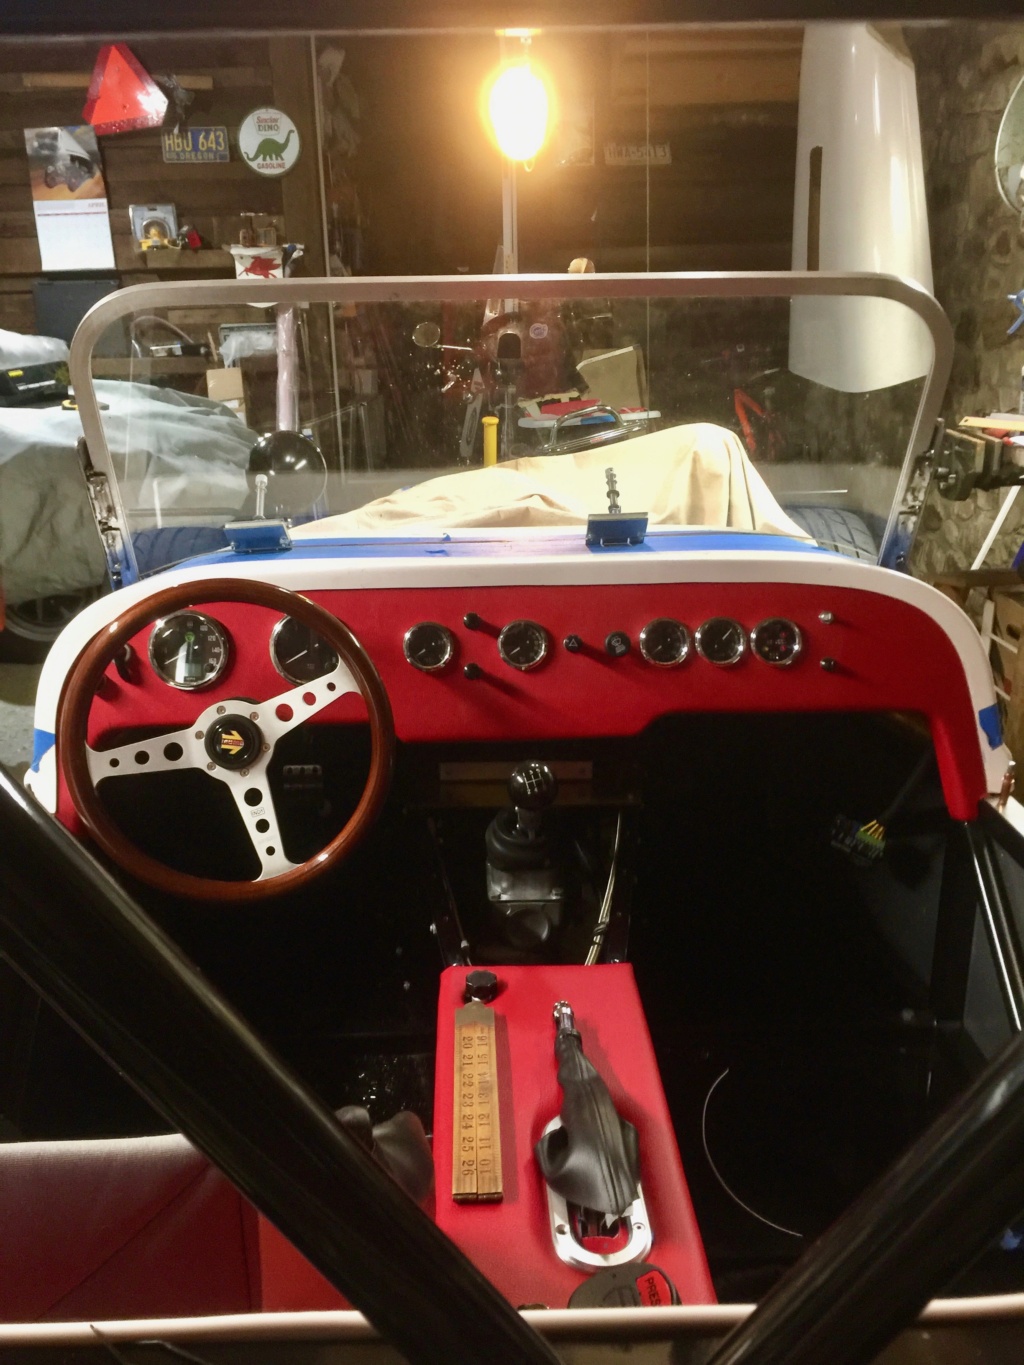
Rough layout of where I expect the wiper gearboxes to end up assuming a 6 inch arm length and a 10 inch blade length

Looking down from the top of the windshield, vertically down the windshield brackets, the angles to align the windshield frame with the brackets are awkward. Additionally the windshield frame u-channel is quite thin and I don't fancy screwing anything into it directly. So I made brackets that absorb the awkward angles and clamp to the windscreen frame with setscrews. The frame slides into the bracket on each side. This makes it possible to adjust the position of the windshield, and it's easy to remove if necessary

Windshield frame positioned relative to the bracket and clamped in place

Detail of the rear of the bracket, clamped up ready to tack weld together. The setscrews work well and provide a solid means of mounting the windshield

With the frame in place the angle between the windshield and the scuttle can be measured

The angle for mounting the wiper gearboxes is quite shallow. I'm making up some wedge shaped spacers that will set the gearbox shaft so that it is exactly 90 degrees to the windshield

I don't know how these will work out. I'll fabricate them this week. I'll be using wiper arms and blades off a Land Rover Series 2A. The arm lengths will need to be adjusted to fit

Rough layout of where I expect the wiper gearboxes to end up assuming a 6 inch arm length and a 10 inch blade length
comled- Posts : 179
Join date : 2015-10-07
Location : New Hope, PA -
Re: Classic R #27 Build - Final Assembly - Part 5
![]() by comled Sun Mar 07, 2021 10:12 am
by comled Sun Mar 07, 2021 10:12 am
So here's where we ended up with the windshield wipers. It's been too cold to do much in the shop and this has taken a while to get done.
The original spacers were too small and I revised the design to make them longer. I located the gearboxes based on the intended wipe angle and available clearance below the scuttle where there is already a lot of equipment installed - heater, wiring etc
The blades are from a Land Rover Series 2A. I had to shorten the arms by drilling out the rivets, cutting the arm to size and re-riveting, none of which could be done until after the gearboxes had been mounted.
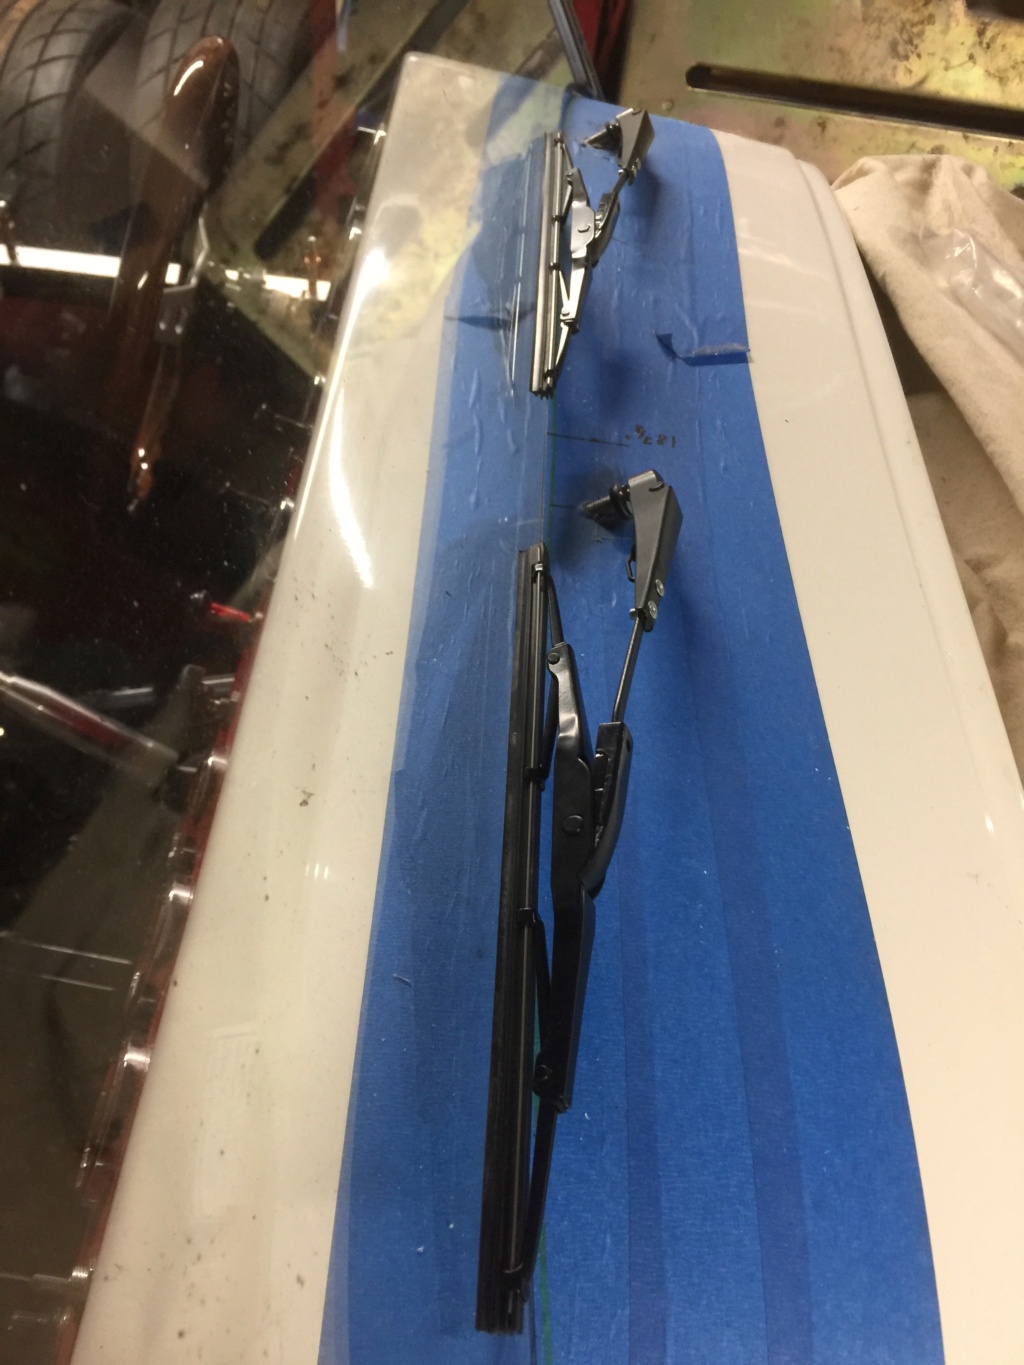
The sweep angle is a little over 90 degrees and the coverage is decent
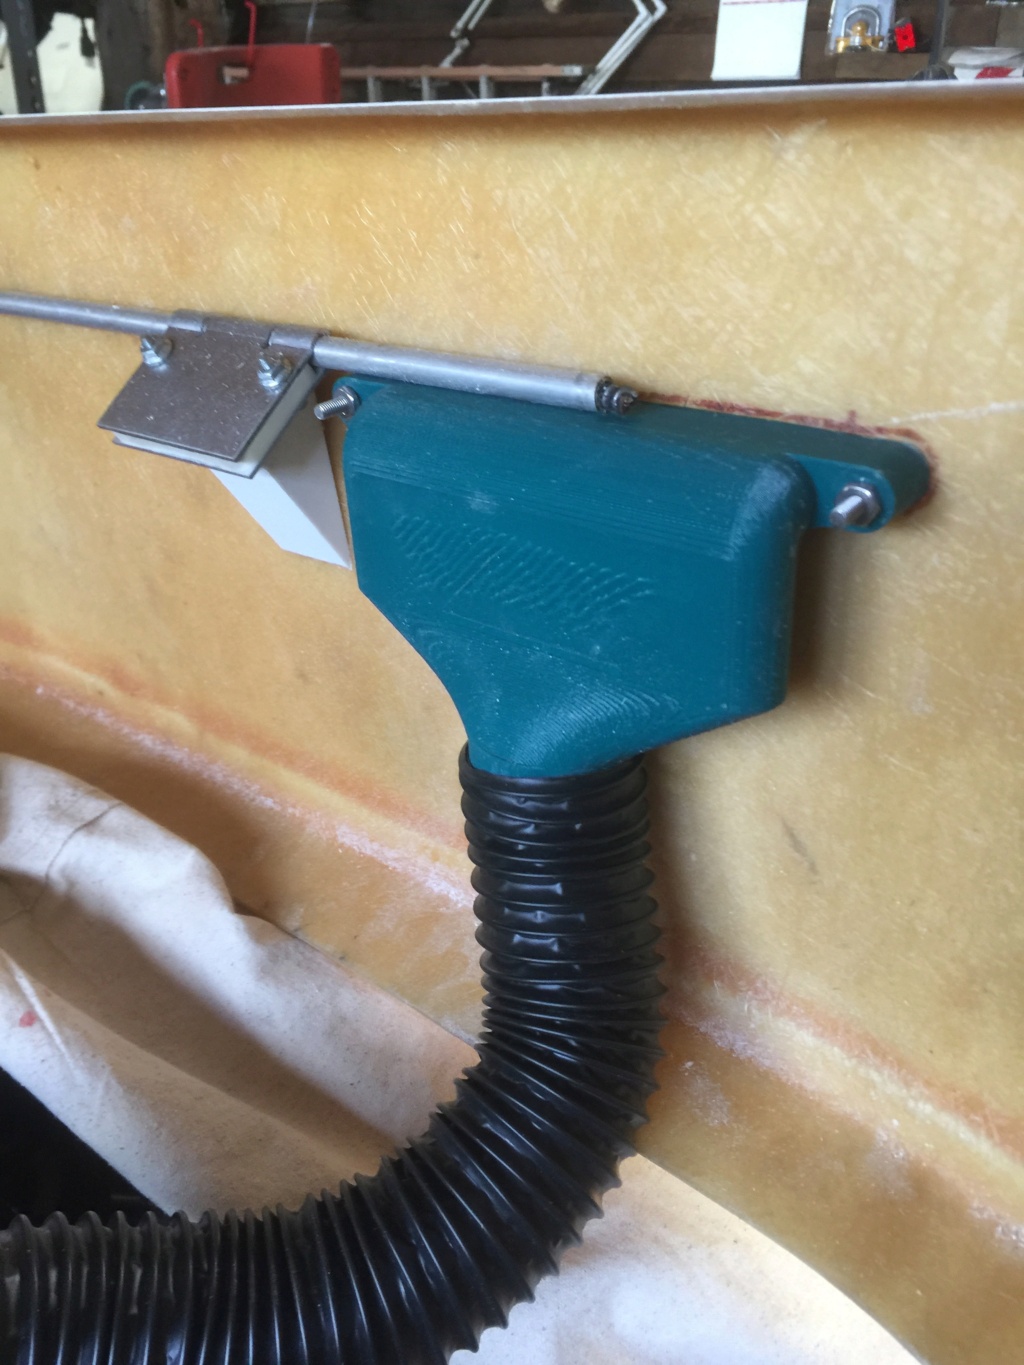
With the windshield mounted and the wiper gearboxes in place the remaining big task was to fit the defroster system. The space under the scuttle is limited. I had to make custom ducts which I 3D printed and bolted to the underside of the scuttle. I then cut a slot for airflow. Siting the ducts was tricky because of the windshield wiper drive and gearboxes but I was able to design the duct to fit around the wiper components to get it located properly.
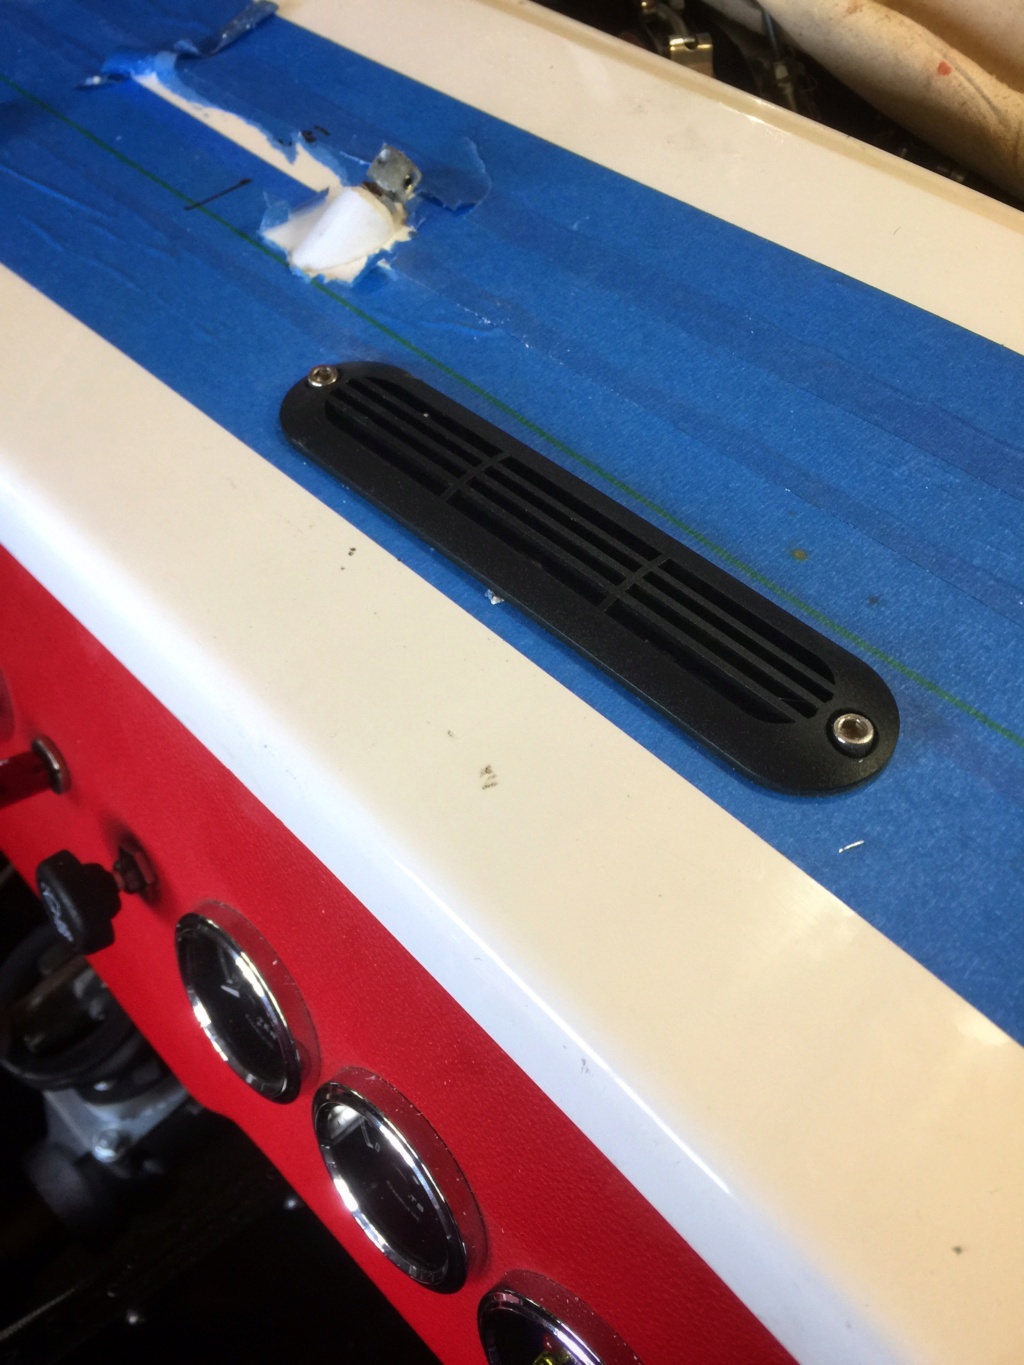
Topside all you see is the vent itself. The vents and hose were part of the original Maradyne kit - I just substituted the original ducts with my own that had a 90 degree bend in them. Airflow is quite decent - not gale force but certainly present.
So that's almost all the scuttle work complete. I turned my attention to the seats.
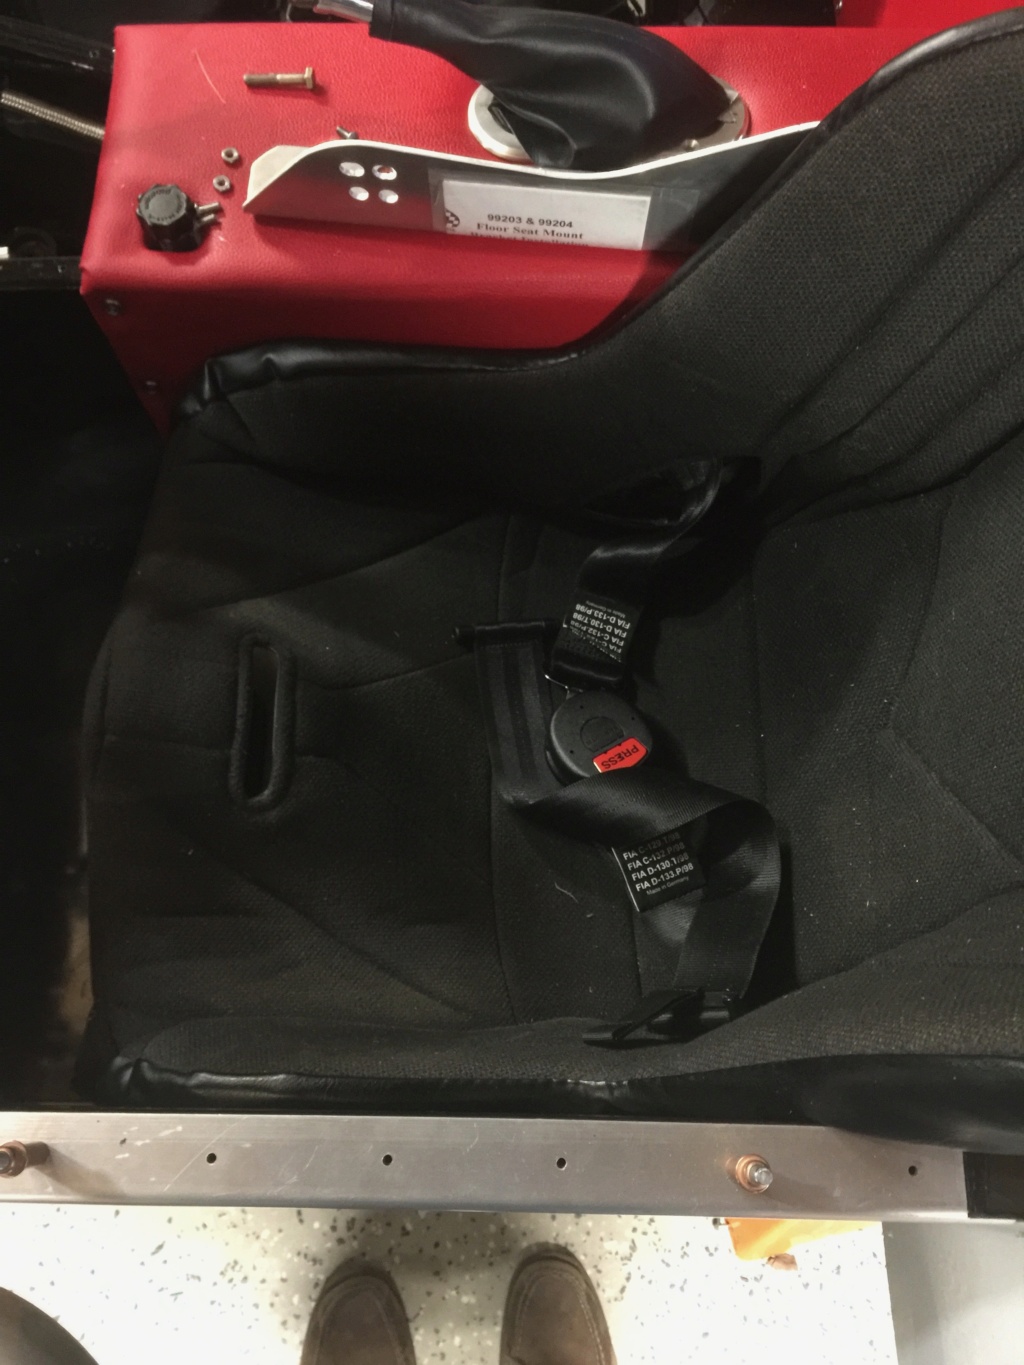
Driver's seat installed. I made a captive nut arrangement for the nuts and bolts at the rear of the seat because there's no topside access at all back there. Pictures to follow. With this approach it's a matter of minutes to pop the seats in and out. I just have to remember to thread the lap belts through the openings in the seat before doing up the bolts.
Need to clean the driver's side seat cover. It's been banging around in the shop for years and is looking pretty ropey.
Made a list this week of what I think needs to be done before we present for state inspection. The list is a lot shorter than it was this time last year but there's still a lot to do.

The original spacers were too small and I revised the design to make them longer. I located the gearboxes based on the intended wipe angle and available clearance below the scuttle where there is already a lot of equipment installed - heater, wiring etc

The blades are from a Land Rover Series 2A. I had to shorten the arms by drilling out the rivets, cutting the arm to size and re-riveting, none of which could be done until after the gearboxes had been mounted.


The sweep angle is a little over 90 degrees and the coverage is decent


With the windshield mounted and the wiper gearboxes in place the remaining big task was to fit the defroster system. The space under the scuttle is limited. I had to make custom ducts which I 3D printed and bolted to the underside of the scuttle. I then cut a slot for airflow. Siting the ducts was tricky because of the windshield wiper drive and gearboxes but I was able to design the duct to fit around the wiper components to get it located properly.

Topside all you see is the vent itself. The vents and hose were part of the original Maradyne kit - I just substituted the original ducts with my own that had a 90 degree bend in them. Airflow is quite decent - not gale force but certainly present.
So that's almost all the scuttle work complete. I turned my attention to the seats.

Driver's seat installed. I made a captive nut arrangement for the nuts and bolts at the rear of the seat because there's no topside access at all back there. Pictures to follow. With this approach it's a matter of minutes to pop the seats in and out. I just have to remember to thread the lap belts through the openings in the seat before doing up the bolts.
Need to clean the driver's side seat cover. It's been banging around in the shop for years and is looking pretty ropey.
Made a list this week of what I think needs to be done before we present for state inspection. The list is a lot shorter than it was this time last year but there's still a lot to do.
comled- Posts : 179
Join date : 2015-10-07
Location : New Hope, PA -
Re: Classic R #27 Build - Final Assembly - Part 5
![]() by comled Tue Jul 06, 2021 1:31 pm
by comled Tue Jul 06, 2021 1:31 pm
comled- Posts : 179
Join date : 2015-10-07
Location : New Hope, PA -
» Classic R #27 Build - Final Assembly - Part 2
» Classic R #27 Build - Final Assembly - Part 3
» Classic R #27 Build - Final Assembly - Part 4
» Classic R #27 Build - Final Assembly - Part 6
» Classic R #27 Build - Final Assembly
» Classic R #27 Build - Final Assembly - Part 3
» Classic R #27 Build - Final Assembly - Part 4
» Classic R #27 Build - Final Assembly - Part 6
» Classic R #27 Build - Final Assembly
Page 1 of 1
Permissions in this forum:
You cannot reply to topics in this forum