Classic R #27 Build - Final Assembly - Part 4
2 posters
Page 1 of 1

Classic R #27 Build - Final Assembly - Part 4
![]() by comled Sun Jun 23, 2019 9:14 am
by comled Sun Jun 23, 2019 9:14 am
Good progress over the last couple of days. I completed the alternator wiring, including a temporary charge light using a 12V incandescent indicator lamp I had on hand. And yes, it does light up when the ignition switch is turned on.

Got most of my engine harness connected and there are a couple of items remaining to be addressed. The MAP sensor cable is too short so I have to extend it, and it's the same story with the camshaft position sensor: the cable run is short and there's not enough slack to clear the alternator belt. Both are easy fixes.

With most of the sensors hooked up I interrogated the PCM again and noted a few errors.

I got the heater installed. Here's one of the two bulkhead passthroughs that I made a couple of years back. Space is a bit tight behind the firewall so this slides through and attaches directly to the barb on the back of the heater core. Everything lines up nicely and it installed cleanly.
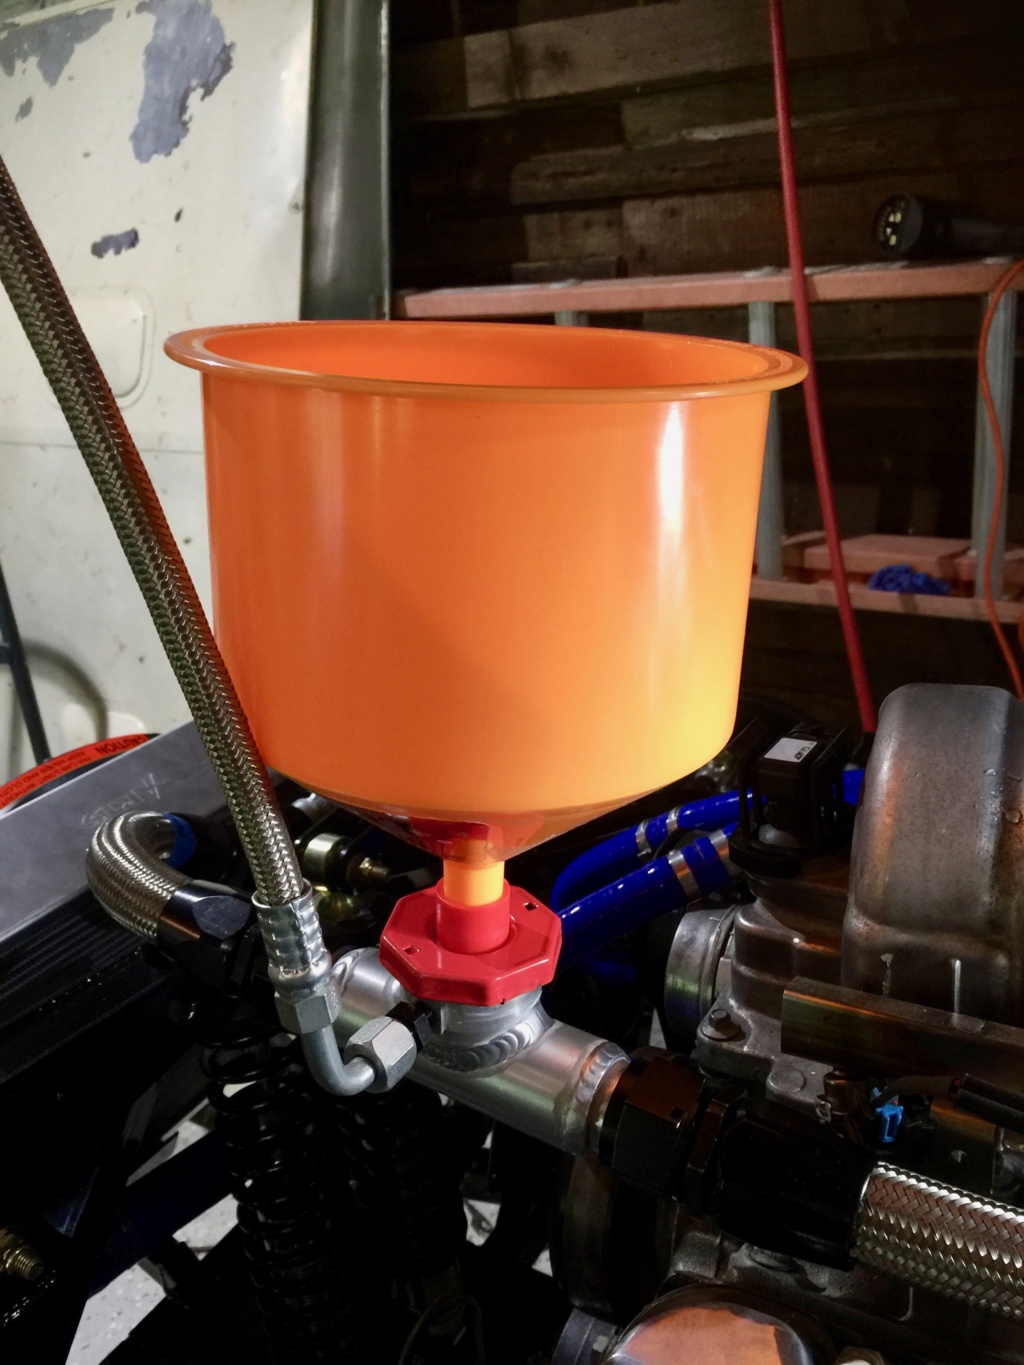
Most importantly I was able to fill the cooling system with tap water to check for leaks. The high point of the system is the heater, and the pressure cap/filler is below it, so I used this orange gadget which works like a charm for filling and burping the cooling system. Found a few leaks: the throttle body adapter plate has to be munged on with RTV and I didn't seal around the throttle heater ports properly (they aren't used in the Northstar throttle body) so I had to take it off, clean it up and reapply the RTV properly around the coolant ports. Also I'd forgotten to tighten down the temperature senders and a few joints in the heater plumbing were loose. I also found the radiator top hose AN fitting was loose but annoyingly I can't get a wrench in to tighten it so today I'll have to slacken the radiator bolts off, pull the radiator forward, tighten the hose and reassemble.
All in all it went quite well and I want to start the same process today for the fuel system once I get done with finishing up the odds and ends from yesterday.

comled- Posts : 179
Join date : 2015-10-07
Location : New Hope, PA -

Re: Classic R #27 Build - Final Assembly - Part 4
![]() by comled Sun Jun 23, 2019 11:39 pm
by comled Sun Jun 23, 2019 11:39 pm
Sorted out the final leak in the cooling system (for now). Decided to move the coil pack away from a fuel line junction. It was a little too close for comfort in the event of a fuel leak. I'm going to mount the coil pack near the front of the engine where there's plenty of free space and no wiring that might be a potential ignition source. That will need a bracket, so I took some measurements off the ignition module that carries the coils and modeled this plate that bolts to the block.


comled- Posts : 179
Join date : 2015-10-07
Location : New Hope, PA -
Re: Classic R #27 Build - Final Assembly - Part 4
![]() by comled Tue Jun 25, 2019 8:47 am
by comled Tue Jun 25, 2019 8:47 am

Got the coil pack plate CNC plasma-cut and the side bracket welded on.

The finish is zinc plate. I use this lash-up for plating parts for the Land-Rover and it came in handy for this coil pack bracket because I was too lazy to break out the powdercoating gear (which makes a mess in the shop and has to be cleaned up afterwards).

Here is the coil pack mounted at the front left hand side of the engine. The proximity to the coolant filler cap can't be helped but it's the lesser of two evils. I'd rather deal with a wet coil pack than a gasoline-soaked one. Using this location comes at a price because I had to extend the engine harness. But I have to do that anyway for a couple of the sensors so it's not a big deal and it took maybe 90 minutes to cut each of the 13 or so wires and splice in an extra section. Wires were soldered and insulated with heat shrink tubing. I'll want to weatherproof the connector since it's exposed.
With the coil pack in place I was able to connect the spark plug wires and check for length. For now I'm just going to use the beaten up old stock ones that came with the engine way back in 2015 but I may splurge on a set of Magnecor wires now that I can properly dimension everything.
Sensors and spark check today, and that leaves wiring the fan controller, bringing up the fuel system and attaching the headers and exhausts (temporarily). I think I'm getting quite close to firing this thing up. Current parts on order include a pressure cap and more teflon wire so I can get the fan wired in, and more split woven loom wrap so I can dress some of this wiring.
comled- Posts : 179
Join date : 2015-10-07
Location : New Hope, PA -
Re: Classic R #27 Build - Final Assembly - Part 4
![]() by comled Thu Jun 27, 2019 12:35 am
by comled Thu Jun 27, 2019 12:35 am
It was a massive push yesterday and today to get the engine started and tonight I finally fired it up. Lots of fuel and ignition problems but fortunately I'd worked through those before trying to start the engine. Before this I'd worked through the ignition system (no spark, a pin in one of the connectors hadn't seated properly), no fuel flow (pump wired with the wrong polarity), and multiple fuel leaks. I also spun the engine up with no fuel or spark to develop oil pressure, then reconnected everything and gave it some beans.
Here's a video:
I can still hardly believe it actually runs. There was no drama, no smoke, liquids spraying everywhere, just a rather sluggish and hesitant run to start with, followed by a fuse blowing that caused the engine to shut down. I'd put a 5A fuse in the ignition module feed where a 10A was called for. Replaced, fired up and warmed the headers up so that the paint would cure on them.
Wow - had to celebrate with a Bell's. Feels like progress!
comled- Posts : 179
Join date : 2015-10-07
Location : New Hope, PA -
Re: Classic R #27 Build - Final Assembly - Part 4
![]() by comled Mon Jul 01, 2019 12:04 am
by comled Mon Jul 01, 2019 12:04 am
More chipping away at engine-related tasks now that the engine is running. No photos because the camera in my phone seems to have gone on the blink. Briefly, I replaced a 45 degree coupling in the fuel system because it was weeping some gasoline. No trace of that leak remains. Then I wired in the Dakota Digital PAC-2750 fan controller. No issues to report. I'm using Speedhut gauges and there's no Speedhut temperature sender option so I had to calibrate the controller to the Speedhut temperature sender. I've been comparing gauge readings with the readings over ODB2 and there's no appreciable difference between them, which is heartening. The Maradyne M142K cooling fan requires at least a 25A fuse. Ordered 73.1 to 67.1mm concentric hub rings for the front wheels. The ones I got before were too small. Also ordered parts to plumb in the overflow coolant tank.
comled- Posts : 179
Join date : 2015-10-07
Location : New Hope, PA -
Re: Classic R #27 Build - Final Assembly - Part 4
![]() by comled Tue Jul 02, 2019 7:10 pm
by comled Tue Jul 02, 2019 7:10 pm
Today I finally got #27 off the build table and standing on its own four wheels. I used an electric winch to lift the rear, and the shop crane to lift the front simultaneously, then lowered each end a little at a time until it was down. I'll admit to a little nervousness at the prospect of lifting an 1800lb car on my own but nothing ventured, nothing gained. Here's a 4x speed video of me doing the job. Watch out for the oops moment when I realize that the front of the car won't clear the legs of the shop crane and I have to scramble for some wooden blocks to support the front end on:
With the car down I took a few pictures and had a tea break. Must set the date properly on my cheapo gopro. And the shop looks like a bomb's hit it.


Haven't finished the wiring yet and none of the hoses are dressed but you get the general idea from this overhead shot of the engine bay

Rear end sees the light of day for the first time.

Exhausts on, clutch bled, driver's seat temporarily installed and a quick trip outside to run the engine up to normal operating temperature.

Look at all that crap on the tires, and we only went down the drive and back up.

More of the engine bay.
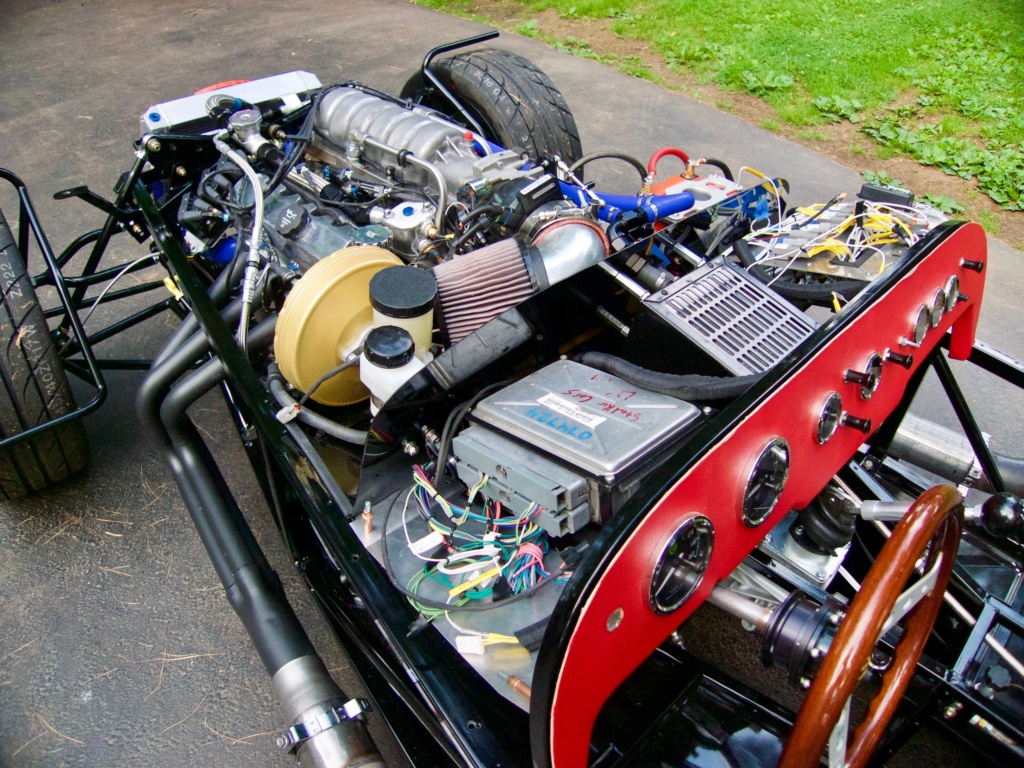
Looking a bit untidy from this angle but there's still a lot of wiring and routing to be done.
Some things were immediately evident from just moving the car under its own steam. It would be nice to have a pedal stop behind the clutch. Also the parking brake pads need to be slackened off a little as they are binding on the rear rotors. My rough alignment's horrid, especially the camber and the rear wheels are pigeon-toed. I noted a small leak on the radiator top hose end fitting that I must fix. The frame rails above the headers get pretty warm and I'm thinking about wrapping the headers anyway even though they're ceramic coated. But the engine starts, the battery charges, it shifts in and out of gear, moves under its own steam, stops, and steers. The fan comes on at 205F and goes off at 200F. So I guess it qualifies as a car at this point. Wifey and I are going out for a burger to celebrate.
comled- Posts : 179
Join date : 2015-10-07
Location : New Hope, PA -
Re: Classic R #27 Build - Final Assembly - Part 4
![]() by comled Fri Jul 05, 2019 10:54 am
by comled Fri Jul 05, 2019 10:54 am
Started some basic initial alignment setup on the rear of the car yesterday. I used a steel bar clamped to the rotor and run forward alongside the chassis, then made measurements between it and the lower frame rail. Following Scott's advice, set the ride height to 6.5", -1 degrees of camber and a hint of toe-in. Hope to get the front set up today. I have a motorcycle jack that turned out to be ideal for lifting the rear of the car as it has a low profile, rubber bumpers on the lifting surface, and it lifts the entire rear handily.
comled- Posts : 179
Join date : 2015-10-07
Location : New Hope, PA -
Ted FM 13 likes this post
Re: Classic R #27 Build - Final Assembly - Part 4
![]() by Ted FM 13 Sat Dec 07, 2019 2:33 am
by Ted FM 13 Sat Dec 07, 2019 2:33 am
sawwwweeeeeeeeeeeeeeeeeeet !!!

Ted FM 13- Posts : 112
Join date : 2015-11-27
Location : Sacramento CA -
Re: Classic R #27 Build - Final Assembly - Part 4
![]() by comled Sun Oct 11, 2020 8:41 am
by comled Sun Oct 11, 2020 8:41 am

I can't believe I've been working on this now for nearly 5 years. I'm sure most people get these put together in a much shorter time! But what's the hurry. So for the past year I've been distracted by a 1966 Land Rover Series 2A rebuild that took priority. Now I can refocus on getting the Classic R finished up.

Where we left off was in the middle of wiring. I had broken my turn signal switch and this is the repaired version. In the original part, a threaded bakelite extrusion sticks through the dash and gets bolted on but if you're heavy handed with it as I was, it just snaps off. I'd dragged my heels on fixing it and it was holding up a chunk of the wiring. This replacement is a turned brass part so hopefully I won't wreck it. Now I can deal with wiring the turn signals and hazard circuit, which is on the cards for today.

Another thing I'd been struggling with was the dashboard lamps for MIL, charge and handbrake. I'd tried to use an off-the-shelf indicator light housing with 4 LEDs inside, thinking I could modify the electronics to suit this but that approach failed, so last year I designed a custom PCB with all the bits and pieces needed. Finally got the design finished, PCB ordered and the prototype built and fitted into an empty SpeedHut housing. I still have to make a bezel to hide the PCB but now at least the check engine light and alternator charge lights are wired and working, and the handbrake light will be wired in next week once the switch arrives in the mail.
Other things sorted out this weekend: hip panel vinyl applied and screws/trim cups ordered from McMaster; horn circuit completed (only blew three fuses figuring that one out); and the vehicle speed sensor signal from the PCM identified and hooked up to the speedo, which now works. For anyone else looking for this signal it's pin 55 of the PCM blue connector, and it requires a 10k pullup resistor to +12V because it's an open collector output. On my harness this wire is green and it was mislabeled 'Charge Indicator' but it definitely traces to the VSS output pin on the PCM. Photos to follow but since the car is up on jack stands I started the engine, put it in gear and scoped the VSS signal to confirm it was correct before hooking it up to the speedometer.
Hope to complete the turn signal wiring today, then mount the rear fiberglass, mudguards and lamp clusters on the back of the car and start wiring the lighting circuits. Onward!
comled- Posts : 179
Join date : 2015-10-07
Location : New Hope, PA -
Ted FM 13 likes this post
Re: Classic R #27 Build - Final Assembly - Part 4
![]() by comled Mon Oct 26, 2020 8:31 am
by comled Mon Oct 26, 2020 8:31 am
The gripping tale of Classic R #27's Final Build continues here in part 5. Will it *ever* end?
comled- Posts : 179
Join date : 2015-10-07
Location : New Hope, PA -
» Classic R #27 Build - Final Assembly - Part 2
» Classic R #27 Build - Final Assembly - Part 3
» Classic R #27 Build - Final Assembly - Part 5
» Classic R #27 Build - Final Assembly - Part 6
» Classic R #27 Build - Final Assembly
» Classic R #27 Build - Final Assembly - Part 3
» Classic R #27 Build - Final Assembly - Part 5
» Classic R #27 Build - Final Assembly - Part 6
» Classic R #27 Build - Final Assembly
Page 1 of 1
Permissions in this forum:
You cannot reply to topics in this forum|
|
|