Step 4: Pedals, Brakes and Hydraulics
Page 1 of 1

Step 4: Pedals, Brakes and Hydraulics
![]() by GMinehart Tue May 10, 2016 1:12 pm
by GMinehart Tue May 10, 2016 1:12 pm
Pedal, Brake, hydaulics guide.
Pedals and booster install
http://stalkercars.com/Build_Videos/Pedals_Brakes/(1)pedals_brake_booster.wmv
With the MX5 kit, we are going to retain the stock proportioning valve. Keeping the valve bolted to the master cylinder with the lines in it, bend it reward as far as it will go and trim off excess tab to provide clearance to the hood.
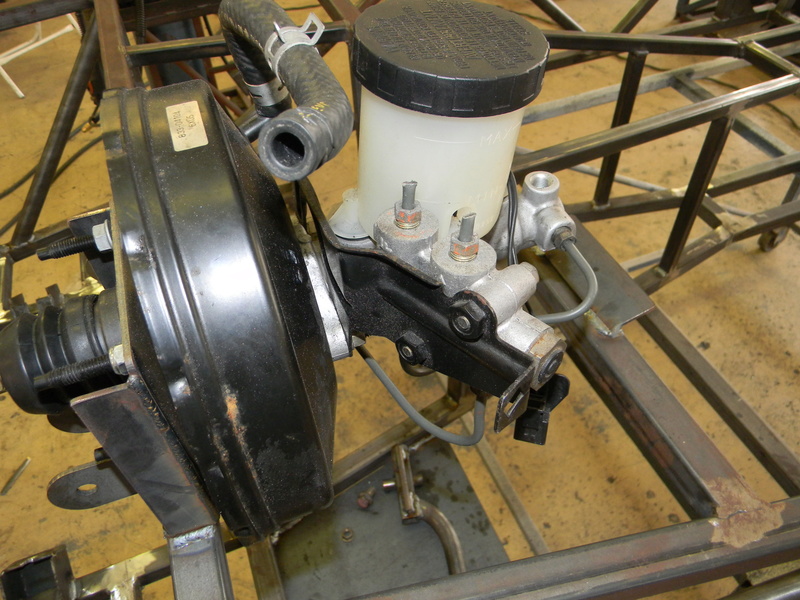
Your kit will include 4 hard brake lines. They will all have 10mm thread on one end, and 3/8" thread on the other.
The 55" line will go from the rear port of the master cylinder, along the upper frame rail, to the front left brake line mounting tab.
The 84" line will go from the proportion valve port labled "F", along the upper frame rail and around the upper frame work to the front right mounting tab.
The 100" line will go from the proportion vlave port labled with an "arrow", through the tunnel to the rear along the upper rail, and will attach to the TEE fitting supplied. From the T fitting your brake lines will mount through the tabs go to your calipers.
The 30" line, will go from your clutch master cylinder (using the wilwood inverted adapter included with the master cylinder) to the mounting tab located near the top of the transmission tunnel. The stock rubber flex line from the clutch slave cylinder will attach here.
Pedals and booster install
http://stalkercars.com/Build_Videos/Pedals_Brakes/(1)pedals_brake_booster.wmv
With the MX5 kit, we are going to retain the stock proportioning valve. Keeping the valve bolted to the master cylinder with the lines in it, bend it reward as far as it will go and trim off excess tab to provide clearance to the hood.
Your kit will include 4 hard brake lines. They will all have 10mm thread on one end, and 3/8" thread on the other.
The 55" line will go from the rear port of the master cylinder, along the upper frame rail, to the front left brake line mounting tab.
The 84" line will go from the proportion valve port labled "F", along the upper frame rail and around the upper frame work to the front right mounting tab.
The 100" line will go from the proportion vlave port labled with an "arrow", through the tunnel to the rear along the upper rail, and will attach to the TEE fitting supplied. From the T fitting your brake lines will mount through the tabs go to your calipers.
The 30" line, will go from your clutch master cylinder (using the wilwood inverted adapter included with the master cylinder) to the mounting tab located near the top of the transmission tunnel. The stock rubber flex line from the clutch slave cylinder will attach here.
GMinehart- Posts : 18
Join date : 2015-05-03
» Step 4: Pedals, Brakes, Hydraulics
» Step 11: ECU and Harness
» Rear Disc Brakes
» Classic R #27 Build - Brake Booster, Dash, Pedals and Steering
» Step 9: Exhaust
» Step 11: ECU and Harness
» Rear Disc Brakes
» Classic R #27 Build - Brake Booster, Dash, Pedals and Steering
» Step 9: Exhaust
Page 1 of 1
Permissions in this forum:
You cannot reply to topics in this forum|
|
|