Classic R #27 Build - Exhaust System
2 posters
Page 1 of 1

Classic R #27 Build - Exhaust System
![]() by comled Mon Sep 26, 2016 7:18 pm
by comled Mon Sep 26, 2016 7:18 pm
Got my headers back from ceramic coating. They look great but the finish is not fully cured so they are very vulnerable to damage. In hindsight I should have held this job back for later but too late now, it's done, so I have to take care of the finish. That said, they do look good. Bonehead Performance in Warminster PA did the work of blasting and then coating the headers. I'm leaving the bubble wrap on for now until they are securely mounted.
Anyone know how to cure these off-car? I considered a heat gun as an option.

Driver's side header. They really do look nice. I've ordered some ARP 12 point stainless bolts and washers to replace the stock items.

Had to bolt one up to the engine to see how it looked. It's also an opportunity to start planning the exhaust mounting and side pipe heat shields (another PA regulatory requirement) that will be needed.

The fit seems a little snug between the collector and the aluminum side panel but there will be enough clearance to accommodate the exhaust pipe. The exhausts themselves look like 4" dia parts. The next step will be figuring out the mounting. It seems other Stalker builders have had to deal with finding somewhere other than the floor to mount the exhaust to. What I'm thinking about is an L-shaped bracket just inside the outboard frame member that will take a bolt through it and some sort of rubber exhaust mount to absorb vibration. I'll chip away at that over the next few days and see what I can work out.
I took the opportunity to order the O2 sensor, specified by Stalker Cars as a 99 GTP upstream sensor. I ordered a Denso 234-4018, about $30.
-Dave
Anyone know how to cure these off-car? I considered a heat gun as an option.
Driver's side header. They really do look nice. I've ordered some ARP 12 point stainless bolts and washers to replace the stock items.
Had to bolt one up to the engine to see how it looked. It's also an opportunity to start planning the exhaust mounting and side pipe heat shields (another PA regulatory requirement) that will be needed.
The fit seems a little snug between the collector and the aluminum side panel but there will be enough clearance to accommodate the exhaust pipe. The exhausts themselves look like 4" dia parts. The next step will be figuring out the mounting. It seems other Stalker builders have had to deal with finding somewhere other than the floor to mount the exhaust to. What I'm thinking about is an L-shaped bracket just inside the outboard frame member that will take a bolt through it and some sort of rubber exhaust mount to absorb vibration. I'll chip away at that over the next few days and see what I can work out.
I took the opportunity to order the O2 sensor, specified by Stalker Cars as a 99 GTP upstream sensor. I ordered a Denso 234-4018, about $30.
-Dave

comled- Posts : 179
Join date : 2015-10-07
Location : New Hope, PA -

Re: Classic R #27 Build - Exhaust System
![]() by comled Sun Oct 02, 2016 9:29 am
by comled Sun Oct 02, 2016 9:29 am
Found a few hours to experiment with ideas for the muffler hanger. The mounting arrangement I came up with seems a bit complicated: I could have just bolted the muffler to the floor but I didn't like that idea since the floor is only an aluminum sheet after all. I could also have drilled a hole through the chassis and run a bolt through it - but that would be a weak spot, plus the area where the hole would have to go is complicated with welds and multiple layers of sheet metal where the side panel and floor meet under the car. This approach sidesteps having to deal with all that.

I made this bracket from 1/8" thick steel bar and hung it off the driver's side footwell cross member. If I end up going this route I may just tack weld the bracket in place. I'll shape the area where the bolt passes through so it looks a bit better. I'll also run the bolt the other way through the assembly so the nut isn't exposed to road dirt.
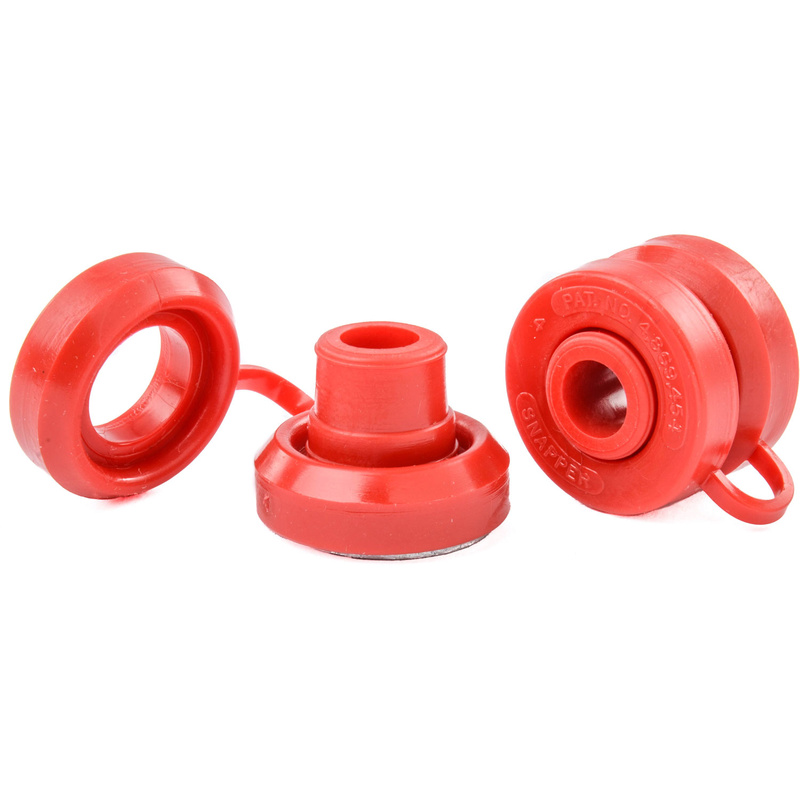
Photo Credit: JEGS
I drilled the tab on the muffler to accept these snap grommets from JEGS (p/n 555-309025). It's a 5/8" hole and I had to use a step drill to get the hole big enough. I got this idea from XL#23 - these heatproof grommets should provide some vibration isolation. Plus they're red and therefore more interesting than other non-red isolating parts.

This rather Heath Robinson arrangement provides a mounting tab at the right height for the muffler to bolt onto. A 2" long 3/8" bolt runs through the bracket in the cabin, through the floor and a spacer holds the tab at the right clearance from the floor in order to set the muffler at the correct angle. The tab can be rotated to align the muffler to the body. I need to get longer bolts to accommodate lock washers: this was just what I had on hand yesterday. If I stick with this approach everything will be powder coated.

Muffler in position. I'm keeping my options open on clearance from the side panel at the moment because I'll have to mount a muffler heat shield which will require bracket space all the way around the muffler.
In other news, I also picked up some ARP stainless 5/16-18 1" long 12 point bolts from JEGS (p/n ARP 612-1000) to mount the headers. They seem to be the perfect length and thread fully into the head. They're also a lot cheaper than buying the ARP header bolt kit which would be around $90 compared to the roughly $40 that three packages of these would cost.
-Dave
I made this bracket from 1/8" thick steel bar and hung it off the driver's side footwell cross member. If I end up going this route I may just tack weld the bracket in place. I'll shape the area where the bolt passes through so it looks a bit better. I'll also run the bolt the other way through the assembly so the nut isn't exposed to road dirt.
Photo Credit: JEGS
I drilled the tab on the muffler to accept these snap grommets from JEGS (p/n 555-309025). It's a 5/8" hole and I had to use a step drill to get the hole big enough. I got this idea from XL#23 - these heatproof grommets should provide some vibration isolation. Plus they're red and therefore more interesting than other non-red isolating parts.
This rather Heath Robinson arrangement provides a mounting tab at the right height for the muffler to bolt onto. A 2" long 3/8" bolt runs through the bracket in the cabin, through the floor and a spacer holds the tab at the right clearance from the floor in order to set the muffler at the correct angle. The tab can be rotated to align the muffler to the body. I need to get longer bolts to accommodate lock washers: this was just what I had on hand yesterday. If I stick with this approach everything will be powder coated.
Muffler in position. I'm keeping my options open on clearance from the side panel at the moment because I'll have to mount a muffler heat shield which will require bracket space all the way around the muffler.
In other news, I also picked up some ARP stainless 5/16-18 1" long 12 point bolts from JEGS (p/n ARP 612-1000) to mount the headers. They seem to be the perfect length and thread fully into the head. They're also a lot cheaper than buying the ARP header bolt kit which would be around $90 compared to the roughly $40 that three packages of these would cost.
-Dave
comled- Posts : 179
Join date : 2015-10-07
Location : New Hope, PA -
Re: Classic R #27 Build - Exhaust System
![]() by comled Sun Oct 09, 2016 9:26 am
by comled Sun Oct 09, 2016 9:26 am
My muffler heat shield parts arrived in the mail this week. I'm using Walker components. I had some difficulty finding the specifications online but eventually turned up a Walker catalog from 2007 with basic measurements which I've exerpted here:

The shield is a Walker 29041, 48" long with round holes. The corresponding clamps for this diameter part are Walker 35884 which I ordered from Summit (WLK-35884 Exhaust Clamps, Heat Shield, Steel, Chrome, 4.000 in. Diameter, Pair). They seem pricey but when you see them close up they are nice solid parts and probably better than hashing something up using jubilee clips.

Out of the box the heat shield looks enormous both length and diameter-wise. Fortunately I only need half of it each side.

I measured exactly 24" and ran a length of masking tape to set the cutting line.
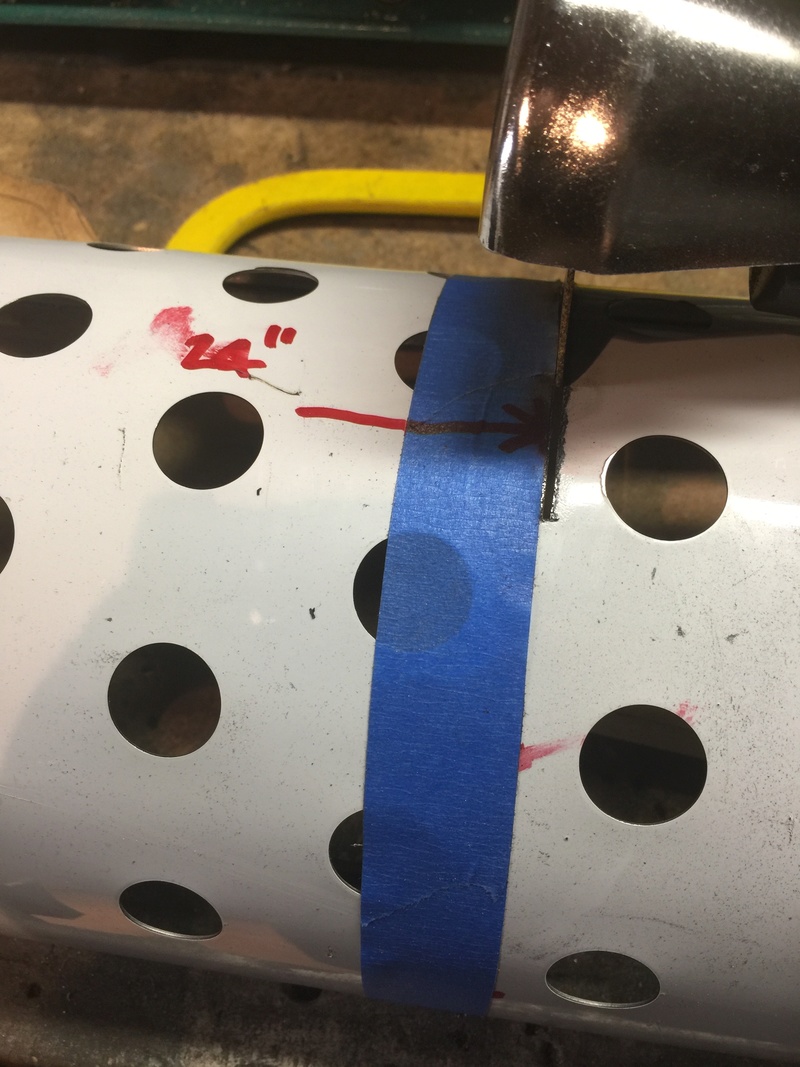
With a fresh 3" cutoff wheel in the air cutoff tool I made the cut, managing not to screw it up. A 24" length is enough to cover the muffler with a bit to spare. The cut off edge doesn't look too bad but visually the holes look a bit close to the cut edge. I'll add a 1 1/2" strip of polished stainless to trim the edge and give it a finished look.

With the clamp installed, the diameter of the shield shrinks down about 5 1/2" inches. The next step is to mount it on the muffler and see how much clearance from the side panel I need for the clamps; then I'll finalize the position of the muffler mounting.
-Dave
The shield is a Walker 29041, 48" long with round holes. The corresponding clamps for this diameter part are Walker 35884 which I ordered from Summit (WLK-35884 Exhaust Clamps, Heat Shield, Steel, Chrome, 4.000 in. Diameter, Pair). They seem pricey but when you see them close up they are nice solid parts and probably better than hashing something up using jubilee clips.
Out of the box the heat shield looks enormous both length and diameter-wise. Fortunately I only need half of it each side.
I measured exactly 24" and ran a length of masking tape to set the cutting line.
With a fresh 3" cutoff wheel in the air cutoff tool I made the cut, managing not to screw it up. A 24" length is enough to cover the muffler with a bit to spare. The cut off edge doesn't look too bad but visually the holes look a bit close to the cut edge. I'll add a 1 1/2" strip of polished stainless to trim the edge and give it a finished look.
With the clamp installed, the diameter of the shield shrinks down about 5 1/2" inches. The next step is to mount it on the muffler and see how much clearance from the side panel I need for the clamps; then I'll finalize the position of the muffler mounting.
-Dave
comled- Posts : 179
Join date : 2015-10-07
Location : New Hope, PA -
Re: Classic R #27 Build - Exhaust System
![]() by comled Thu Oct 13, 2016 6:43 am
by comled Thu Oct 13, 2016 6:43 am
With the heat shields attached I was able to work on the required clearance from the side of the car as there are clamps, clamp bolts and the heat shield itself to accommodate in that space. Thought again about how I am mounting the exhaust and decided to do away with the Heath Robinson exhaust mount and just run a bolt through the chassis - which is what I should have done in the first place.

I welded this extension onto the mounting tab on the exhaust (actually it's the bracket I made previously) at an angle to position the hole right under the footwell chassis crossmember, then drilled out one of the sheet metal screw holes I'd made for attaching the floor. A 3/8-16 grade 8 bolt long enough to pass through both the chassis member and the snap grommet plus leaving some clearance is needed - 3 1/2" long is enough and I ordered some from McMaster.

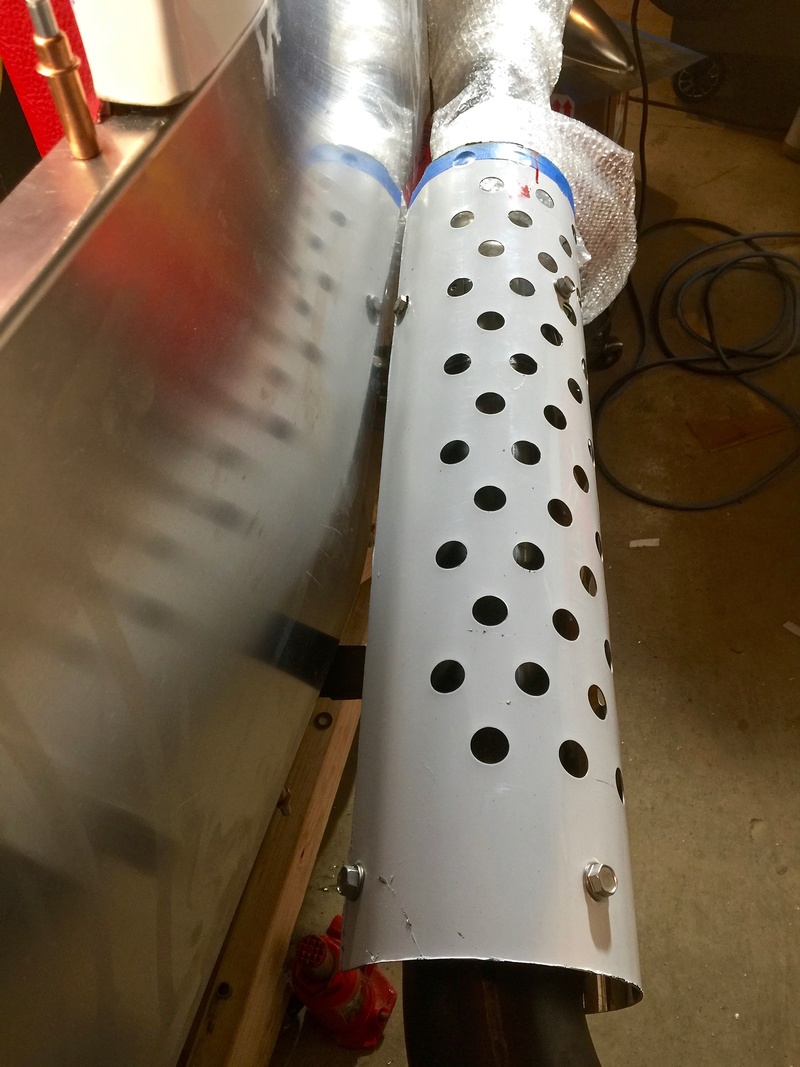
This view along the exhaust shows the heat shield, clamp, clamp bolt, muffler and chassis aligned as I want them. The clamp bolt will have to be trimmed a little shorter to avoid interfering with the side of the car.

Doesn't look too shabby. I ordered a couple of 1 1/2" polished stainless strips to finish the cut edge of the shield. I may have to wrap the exposed part of the header and pipe even though it is ceramic coated - not sure yet how any of this will fare with the PA inspection process.
-Dave
I welded this extension onto the mounting tab on the exhaust (actually it's the bracket I made previously) at an angle to position the hole right under the footwell chassis crossmember, then drilled out one of the sheet metal screw holes I'd made for attaching the floor. A 3/8-16 grade 8 bolt long enough to pass through both the chassis member and the snap grommet plus leaving some clearance is needed - 3 1/2" long is enough and I ordered some from McMaster.
This view along the exhaust shows the heat shield, clamp, clamp bolt, muffler and chassis aligned as I want them. The clamp bolt will have to be trimmed a little shorter to avoid interfering with the side of the car.
Doesn't look too shabby. I ordered a couple of 1 1/2" polished stainless strips to finish the cut edge of the shield. I may have to wrap the exposed part of the header and pipe even though it is ceramic coated - not sure yet how any of this will fare with the PA inspection process.
-Dave
comled- Posts : 179
Join date : 2015-10-07
Location : New Hope, PA -
Re: Classic R #27 Build - Exhaust System
![]() by Ted FM 13 Thu Oct 13, 2016 11:57 pm
by Ted FM 13 Thu Oct 13, 2016 11:57 pm
I normally don't like the looks of heat shields although they are tremendously practical. But I'll probably like yours.

Ted FM 13- Posts : 112
Join date : 2015-11-27
Location : Sacramento CA -
Re: Classic R #27 Build - Exhaust System
![]() by comled Thu Nov 17, 2016 7:36 pm
by comled Thu Nov 17, 2016 7:36 pm
A couple of minor updates to report.

First, I got the rest of the holes drilled along the underside of the car so that I could install and confirm the final position of the side panels (passenger side shown in this picture). I find I get a lot of nausea working under the car for some reason so I have to do it in short sessions with a lot of breaks. I think that's why it has taken me so long to finish up this stage of the project - but I see light at the end of the tunnel and am looking forward to getting back to the cooling system installation.

Here is the side panel on the driver's side along with the exhaust and exhaust shield installed. After a lot of cursing and dismantling and adjusting and reassembling and repeating and more cursing, I was able to get clearance all the way along the exhaust without anything clouting anything else. I figure during final assembly when I install the header gasket I'll get a whisker more clearance but there's enough all the way along to do the job as things stand.
I assembled the header and exhaust for the passenger side and assembled the corresponding heat shield identically to the driver's side.

The two sides are not symmetrical as demonstrated by the adjustments I made to the exhaust mounting brackets to bring the mount points in line with the footwell chassis crossmember.

Here is the trim strip for the cut end of the exhaust shield. I will attach it with three small stainless screws. The shield system isn't finished yet though: I think I still need to shield the header itself. I have been playing with some ideas that use stainless steel mesh, maybe #8 or #10 gauge, and more stainless pieces to create a frame on which to mount it. The header is actually quite small, and the mesh could be sculpted around it for a less intrusive look than say boxing it in. I will also have to fill in the gap between where the side panel ends, and where the control arms pass through the frame behind the front wheels. This will require two new sheet aluminum panels to be fabricated, with bends along the top and along the bottom to align to the frame. The headers will pass through these new panels.
-Dave
First, I got the rest of the holes drilled along the underside of the car so that I could install and confirm the final position of the side panels (passenger side shown in this picture). I find I get a lot of nausea working under the car for some reason so I have to do it in short sessions with a lot of breaks. I think that's why it has taken me so long to finish up this stage of the project - but I see light at the end of the tunnel and am looking forward to getting back to the cooling system installation.
Here is the side panel on the driver's side along with the exhaust and exhaust shield installed. After a lot of cursing and dismantling and adjusting and reassembling and repeating and more cursing, I was able to get clearance all the way along the exhaust without anything clouting anything else. I figure during final assembly when I install the header gasket I'll get a whisker more clearance but there's enough all the way along to do the job as things stand.
I assembled the header and exhaust for the passenger side and assembled the corresponding heat shield identically to the driver's side.
The two sides are not symmetrical as demonstrated by the adjustments I made to the exhaust mounting brackets to bring the mount points in line with the footwell chassis crossmember.
Here is the trim strip for the cut end of the exhaust shield. I will attach it with three small stainless screws. The shield system isn't finished yet though: I think I still need to shield the header itself. I have been playing with some ideas that use stainless steel mesh, maybe #8 or #10 gauge, and more stainless pieces to create a frame on which to mount it. The header is actually quite small, and the mesh could be sculpted around it for a less intrusive look than say boxing it in. I will also have to fill in the gap between where the side panel ends, and where the control arms pass through the frame behind the front wheels. This will require two new sheet aluminum panels to be fabricated, with bends along the top and along the bottom to align to the frame. The headers will pass through these new panels.
-Dave
comled- Posts : 179
Join date : 2015-10-07
Location : New Hope, PA -
Re: Classic R #27 Build - Exhaust System
![]() by comled Sun Nov 20, 2016 5:51 pm
by comled Sun Nov 20, 2016 5:51 pm
Got the passenger side exhaust shield fitted today. However the clearances between the shield and the side panel aren't good and it's not lining up quite right.

I thought about how I might space the header flange a bit further out from the engine to space things a little better. I found these 3800 V6 exhaust flanges at ZZPerformance and ordered a couple of stainless steel ones. They're 3/8" thick and will buy me enough clearance to avoid having anything rub or rattle along the exhaust. I've bought a few items from ZZP and have always been pleased with their parts.

Just for the hell of it I fitted the 02 sensor. I wanted to make sure that it would at least screw into the bung. Seems ok but obviously there's no way to tell yet whether it will function properly.
comled- Posts : 179
Join date : 2015-10-07
Location : New Hope, PA -
» Classic R #27 Build - Fuel System
» Classic R #27 Build - Cooling System
» Classic R #27 Build
» Classic R #27 Build - Windshield
» Classic R #27 Build - Hubs, Calipers, Flexible Brake Hoses
» Classic R #27 Build - Cooling System
» Classic R #27 Build
» Classic R #27 Build - Windshield
» Classic R #27 Build - Hubs, Calipers, Flexible Brake Hoses
Page 1 of 1
Permissions in this forum:
You cannot reply to topics in this forum|
|
|